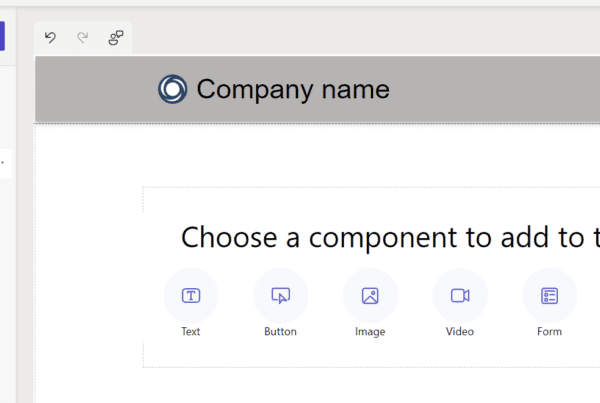
In this post, we will look at using Dynamics 365 Web Hooks, or webhooks, in the Plugin Registration Tool. We will call out to Power Automate as well as an Azure Function.
First, let’s open the Plugin Registration Tool and log into an org. We see the options for:
- Register New Assembly
- Register New Step
- Register Image
- Register New Service Endpoint
- Register New Web Hook
- Register New Data Provider
- Register Custom API
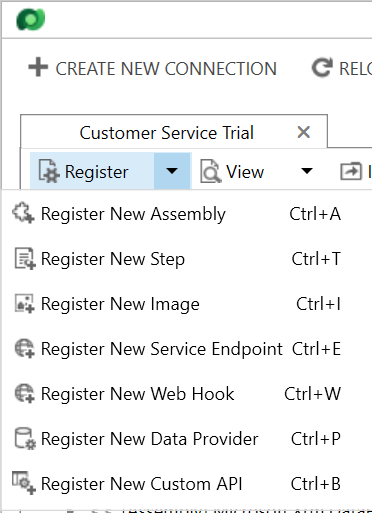
Register New Web Hook
With Register New Web Hook, we can set up a subscription to events that happen in Dynamics 365. For example, if a lead is created, we can send a payload to an HTTP subscriber. A really simple way to set up an HTTP listener is by using Power Automate. You can see how to do that here. Also, Priyesh Wagh has a nice walkthrough of how to use Power Automate with webhooks.
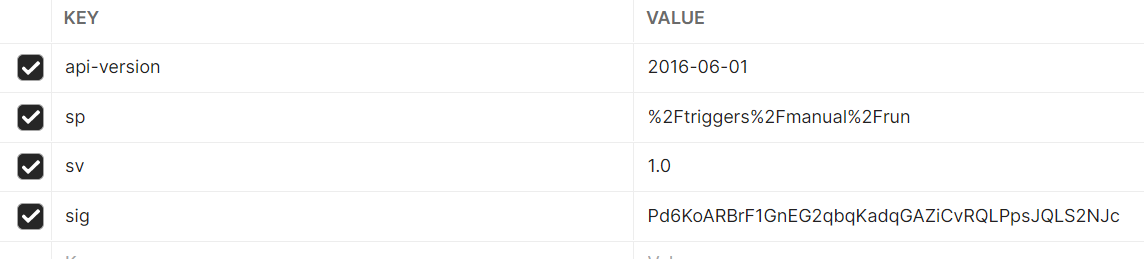
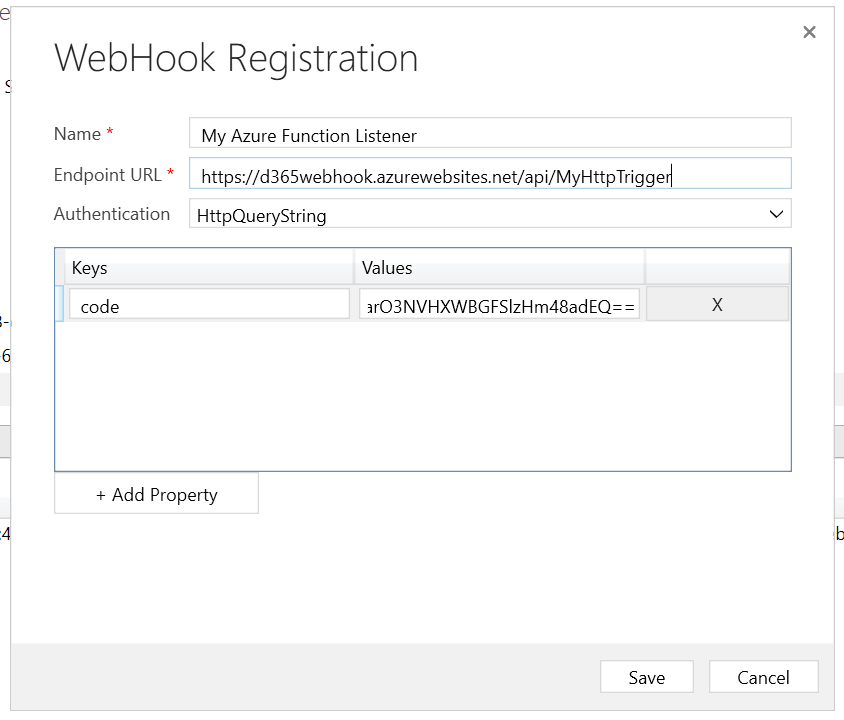
Once you set up your HTTP listener, you can register it by entering in the name and URL. Note the options to provide authentication. You will also need to remove any query string parameters and add them as key/value pairs. In this case:

Becomes:
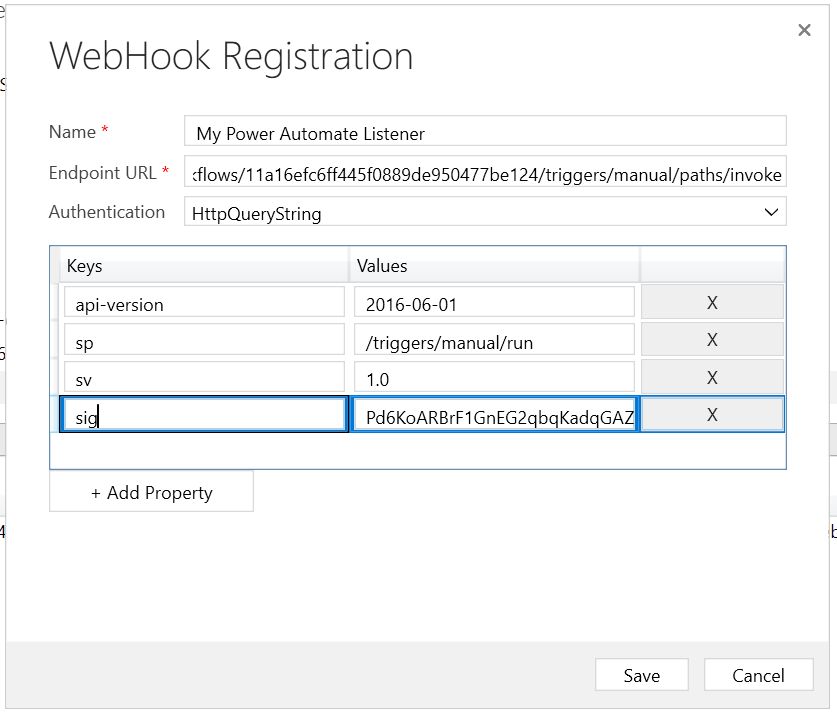
If you copy parameters from Postman be sure to change the “%2F” to /:
Click on Save. I recommend opening the Webhook entry and making sure the parameters are available. If they are not available, try downloading the latest Plugin Registration tool.

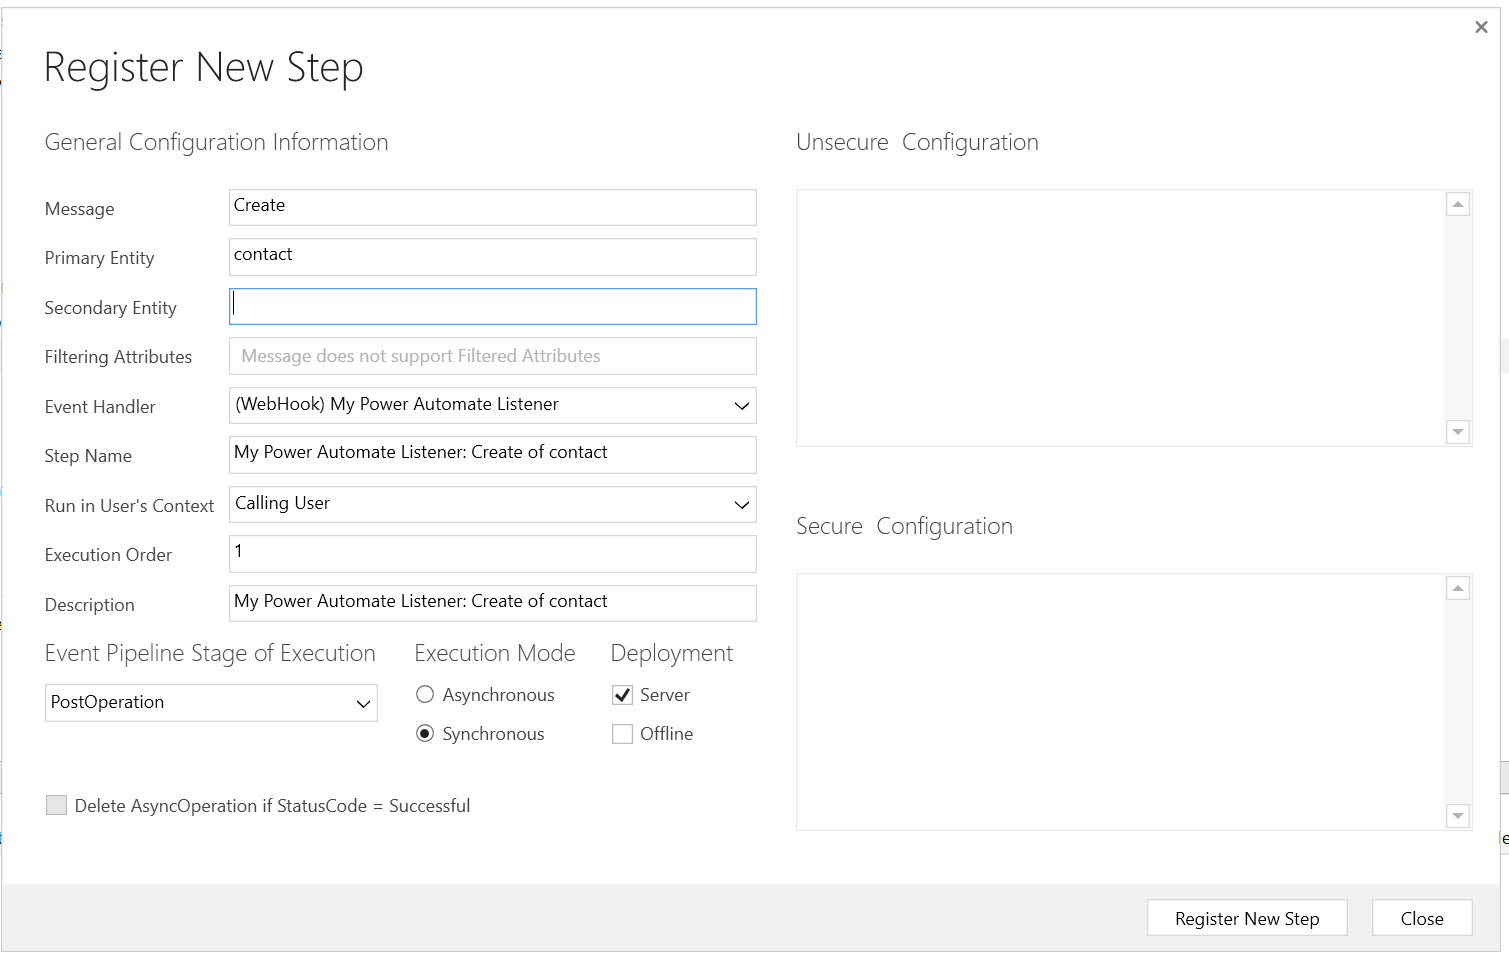
Once saved, add a new step for Create on a Contact:
Now let’s create a contact in D365:

We get the email, with the body:
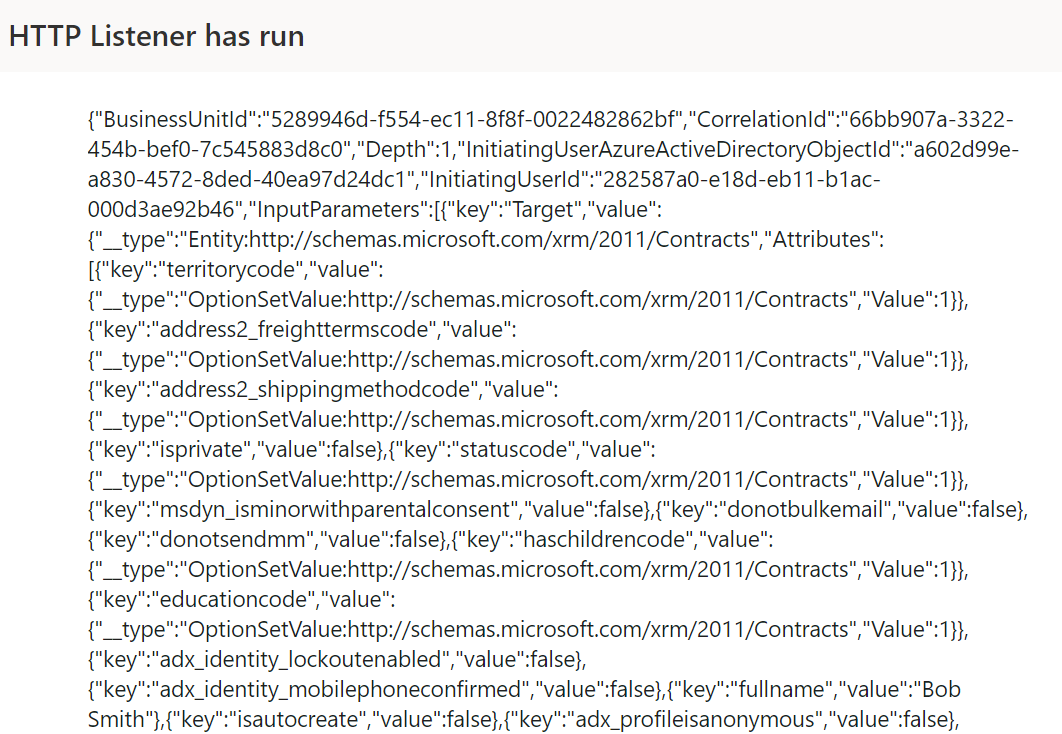
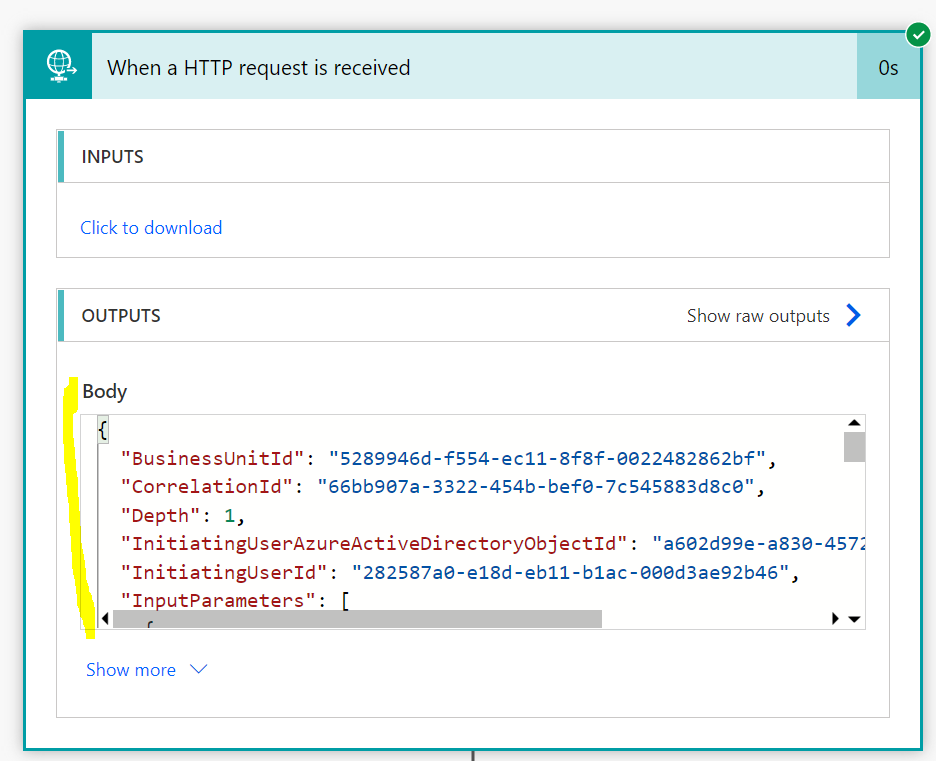
And in Power Automate, we can inspect the body of the flow and parse it, then extract any information we need to use in our flow later. In our case, the JSON contains information about the contact that was created:
Now let’s try this with Azure Functions.
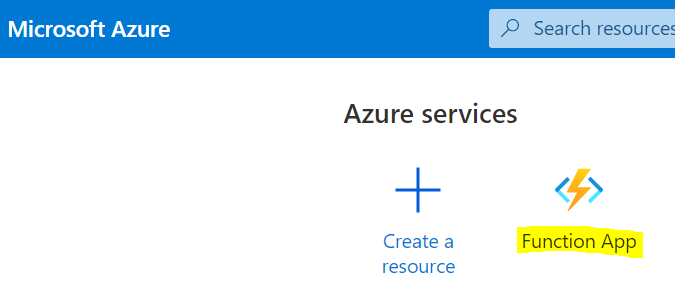
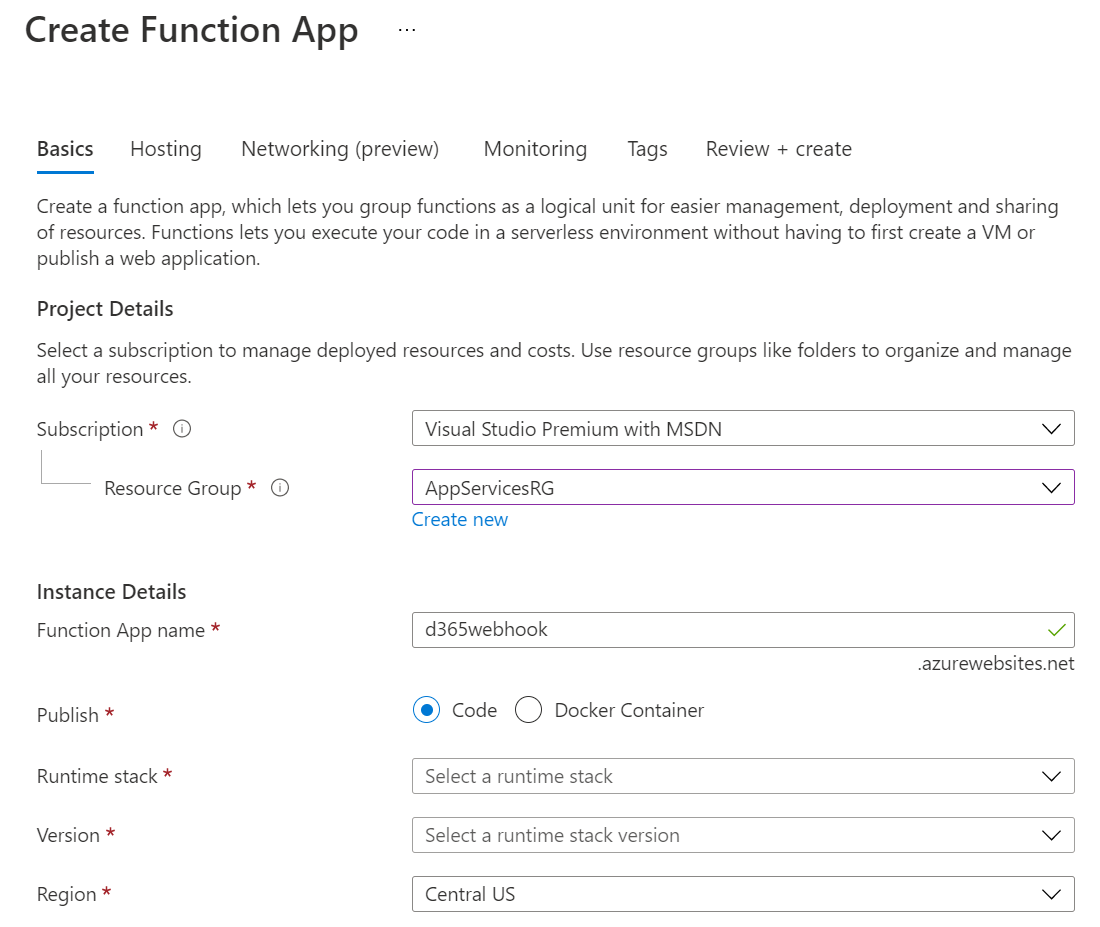
Go to https://portal.azure.com and create a new Function App:
Click Create:

Provide details for the app, then click Review and Create, then Create:
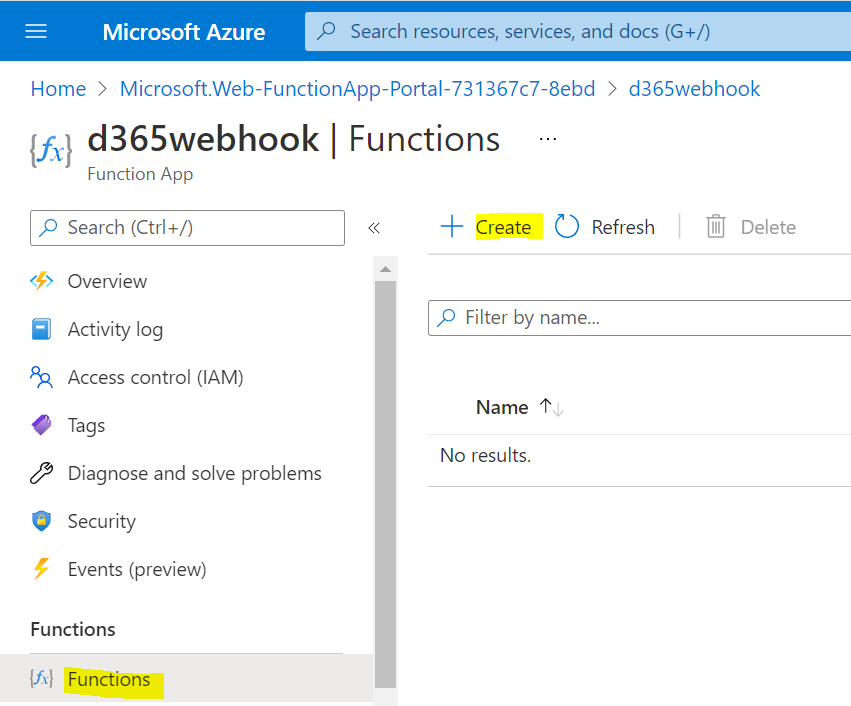
Once it is deployed, go to the new resource, then Functions, then Create:
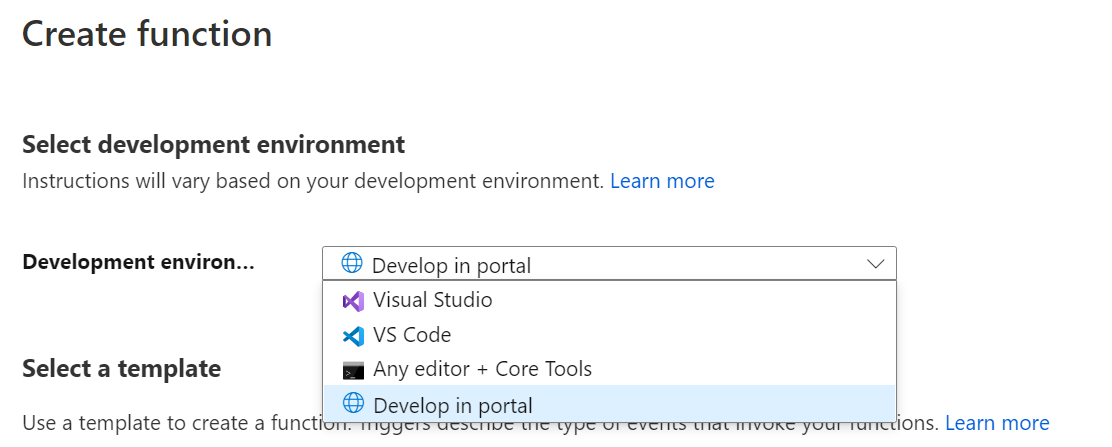
We will select to Develop in Portal:
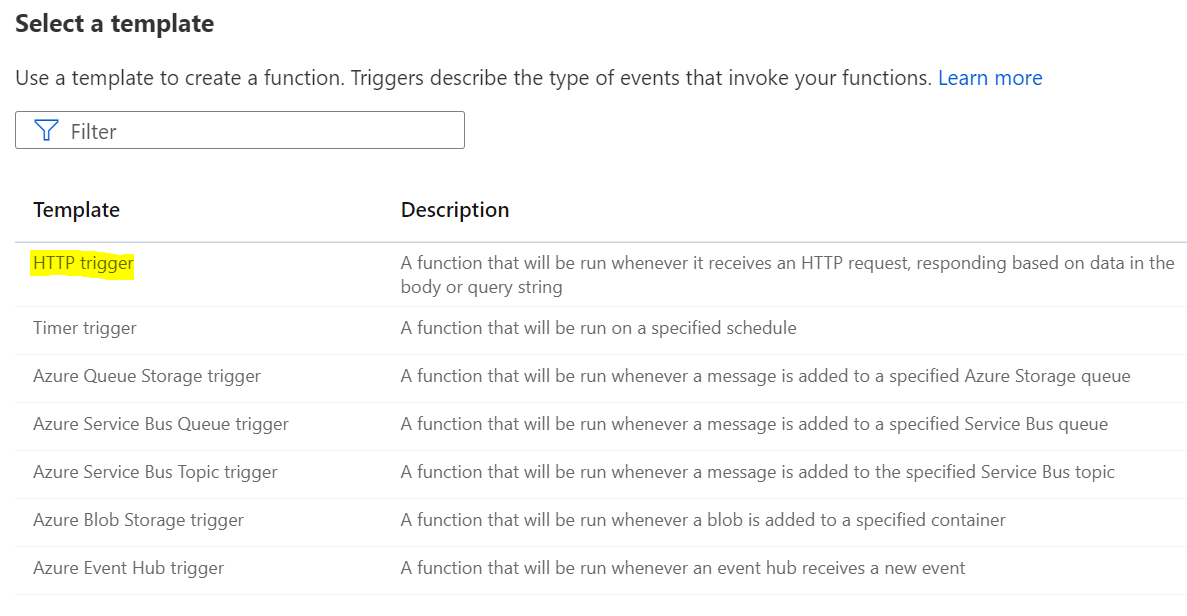
And an HTTP Trigger, which runs when “A function that will be run whenever it receives an HTTP request, responding based on data in the body or query string”:
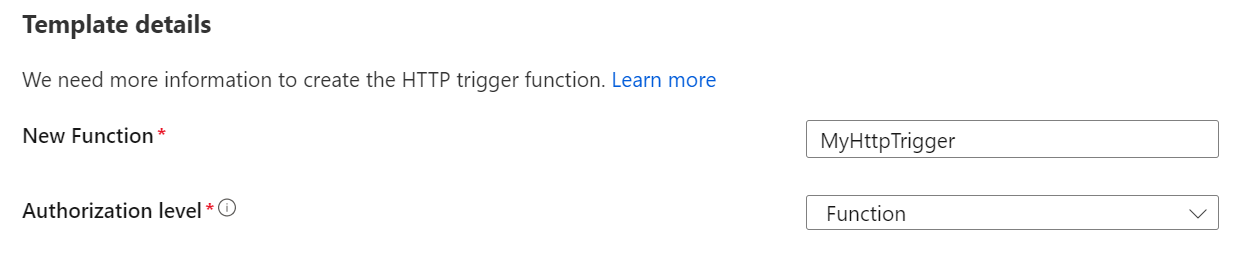
Select below, and click Create:
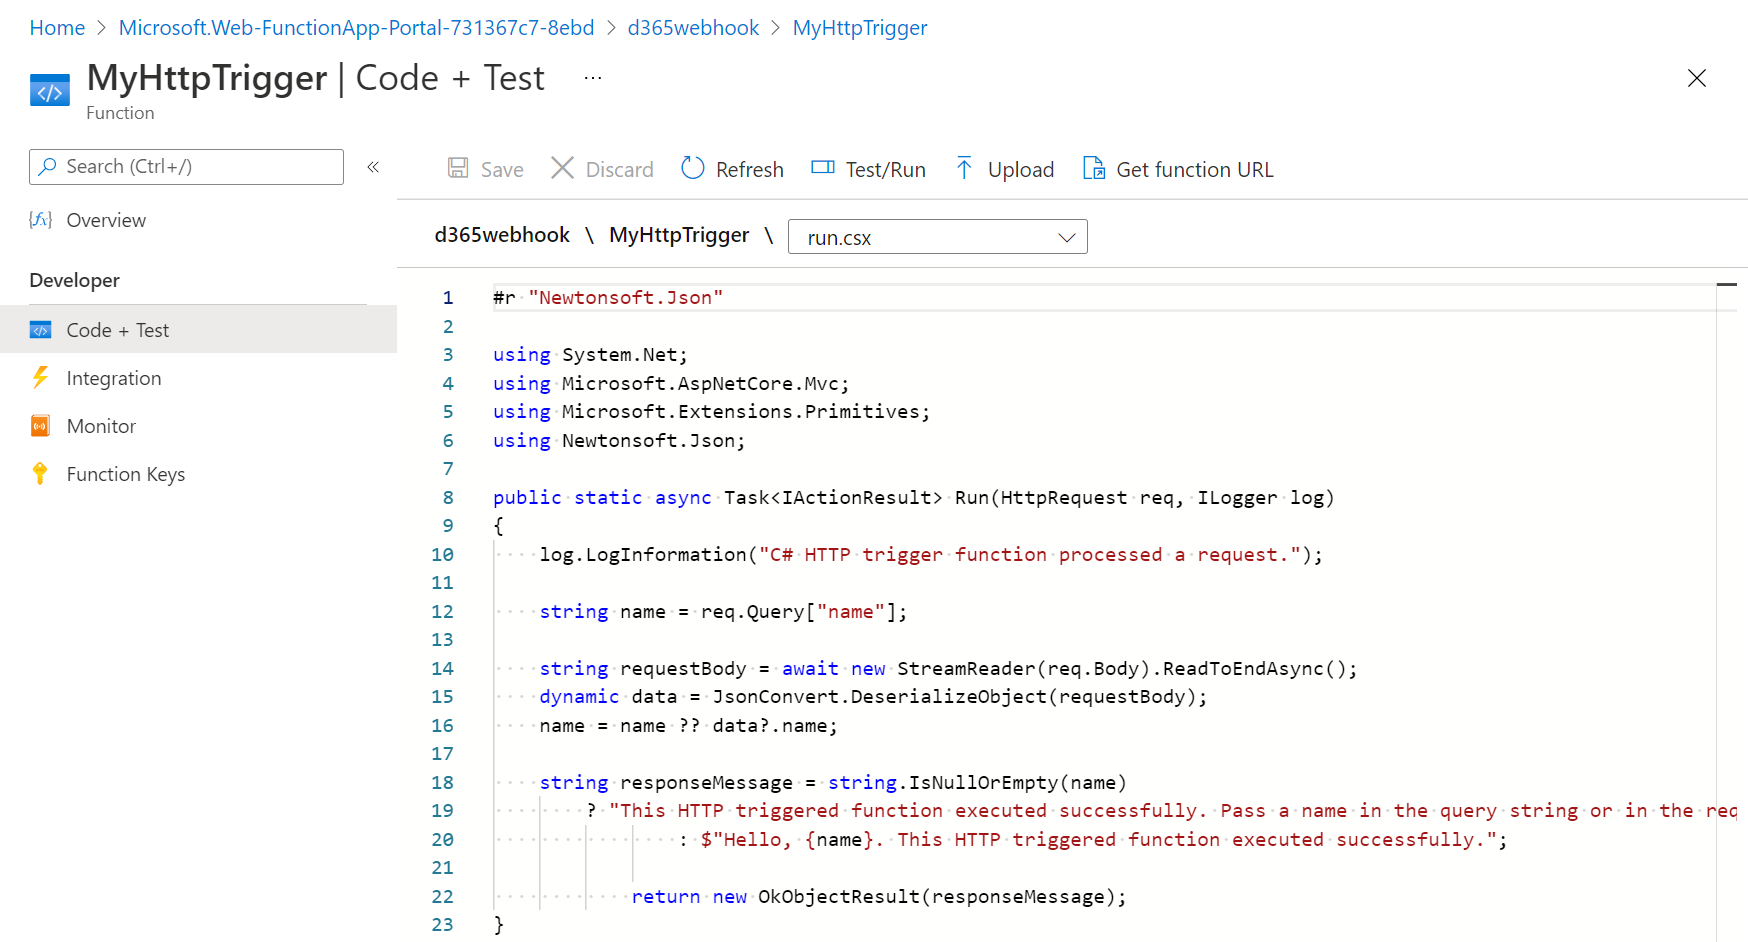
Beside Code and Test, we see the code basically logs the request it receives:
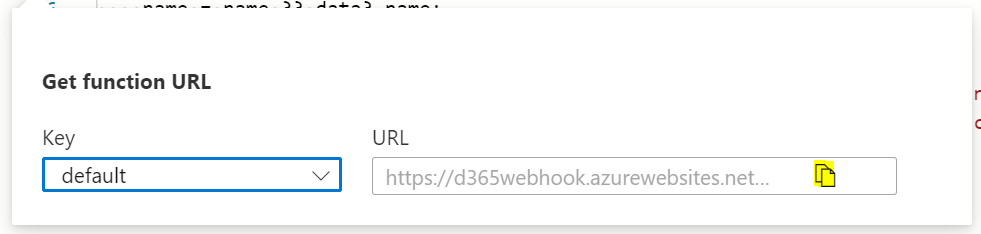
Click on Get Function URL:

And get the URL:
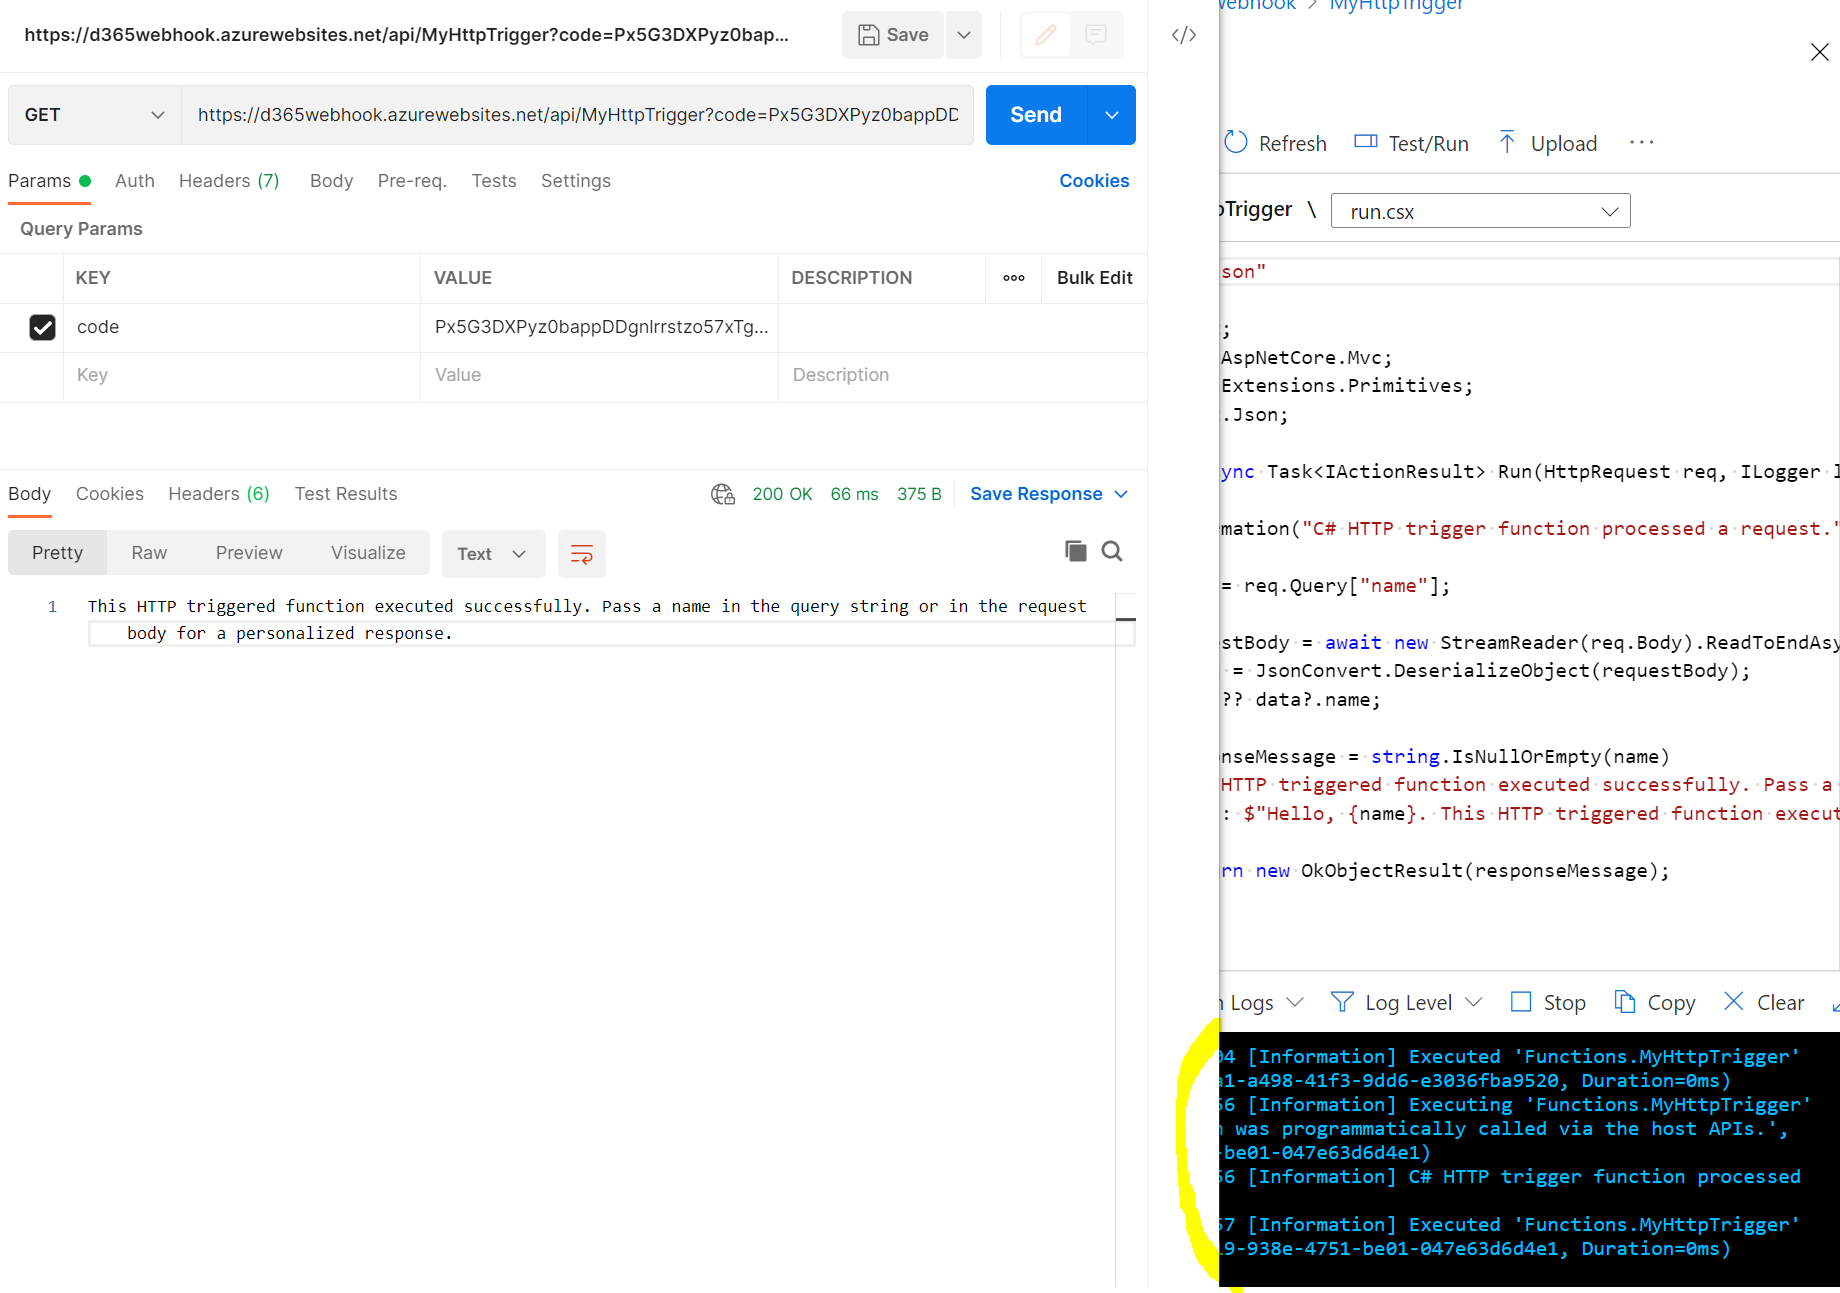
Sending through the request in Postman, we can see it gets logged in Azure:
Let’s add this to Dynamics 365. Again, we let’s create a new Webhook in the PRT:
On creating a new contact, we see the logs getting creating in Azure:
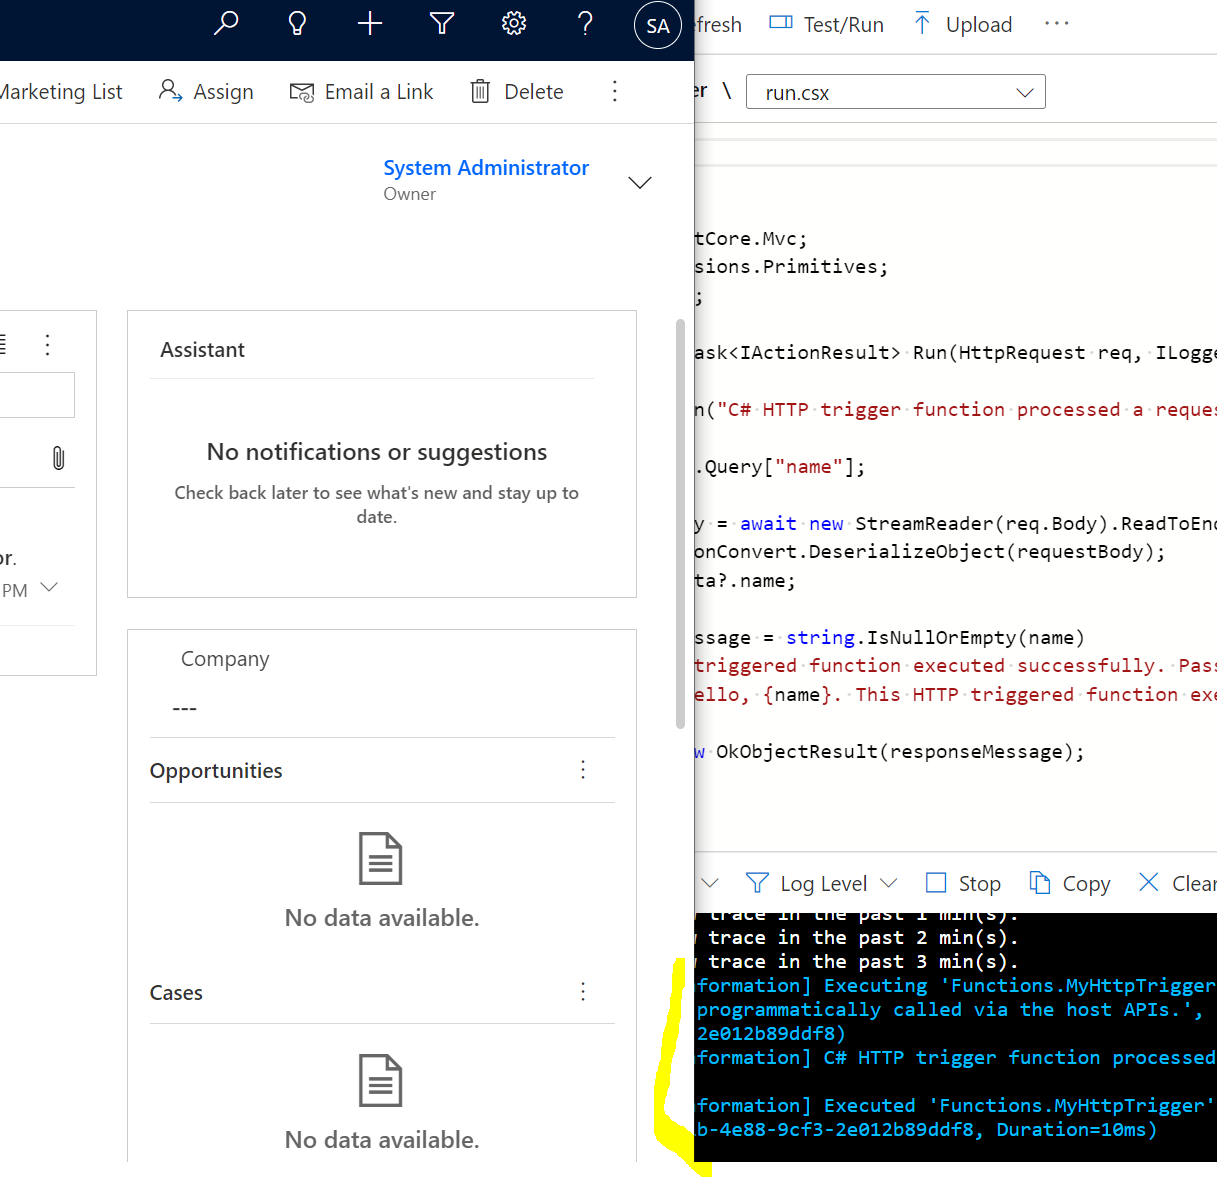
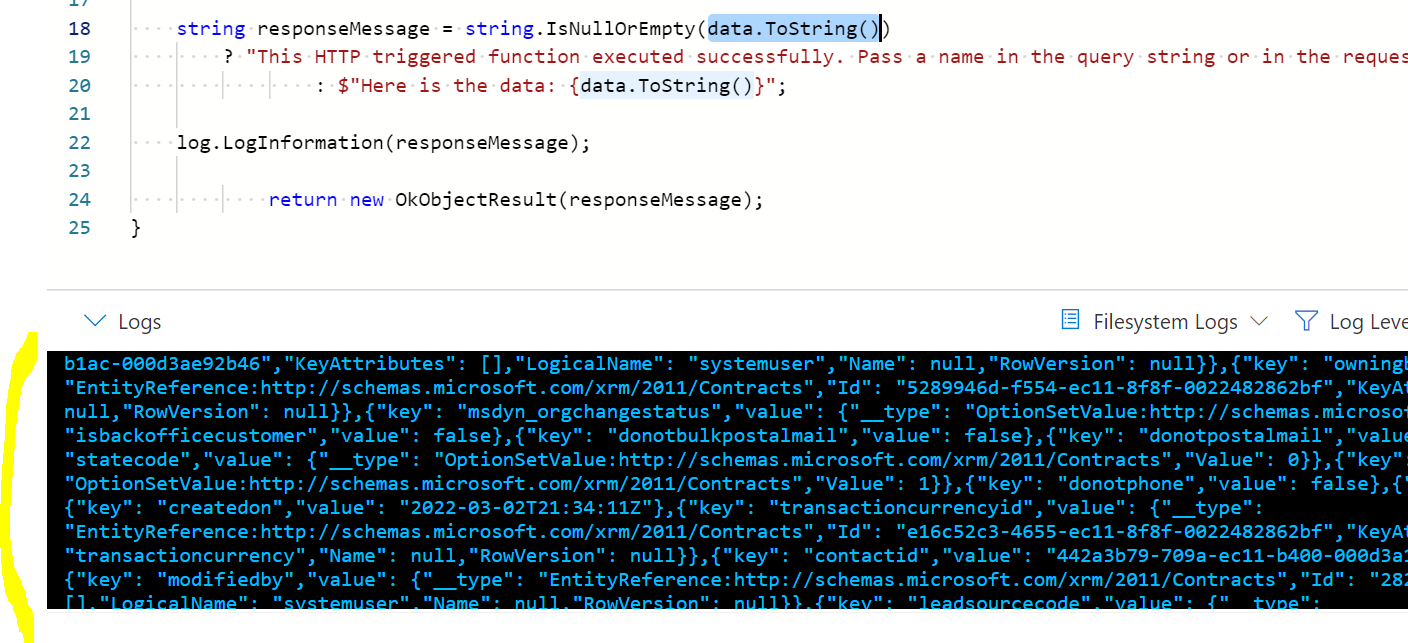
Let’s change this to output the data in the logs. When we do that like below, we see the actual input from D365, which includes the information about the customer:
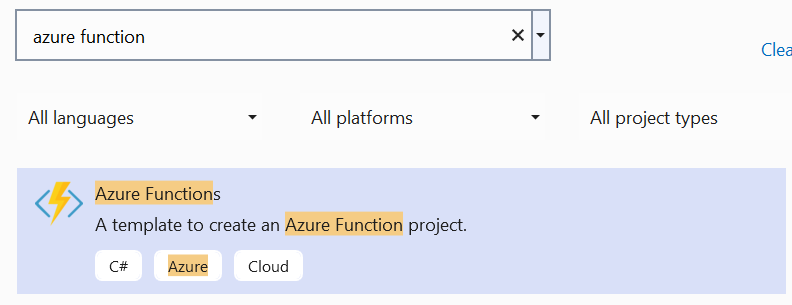
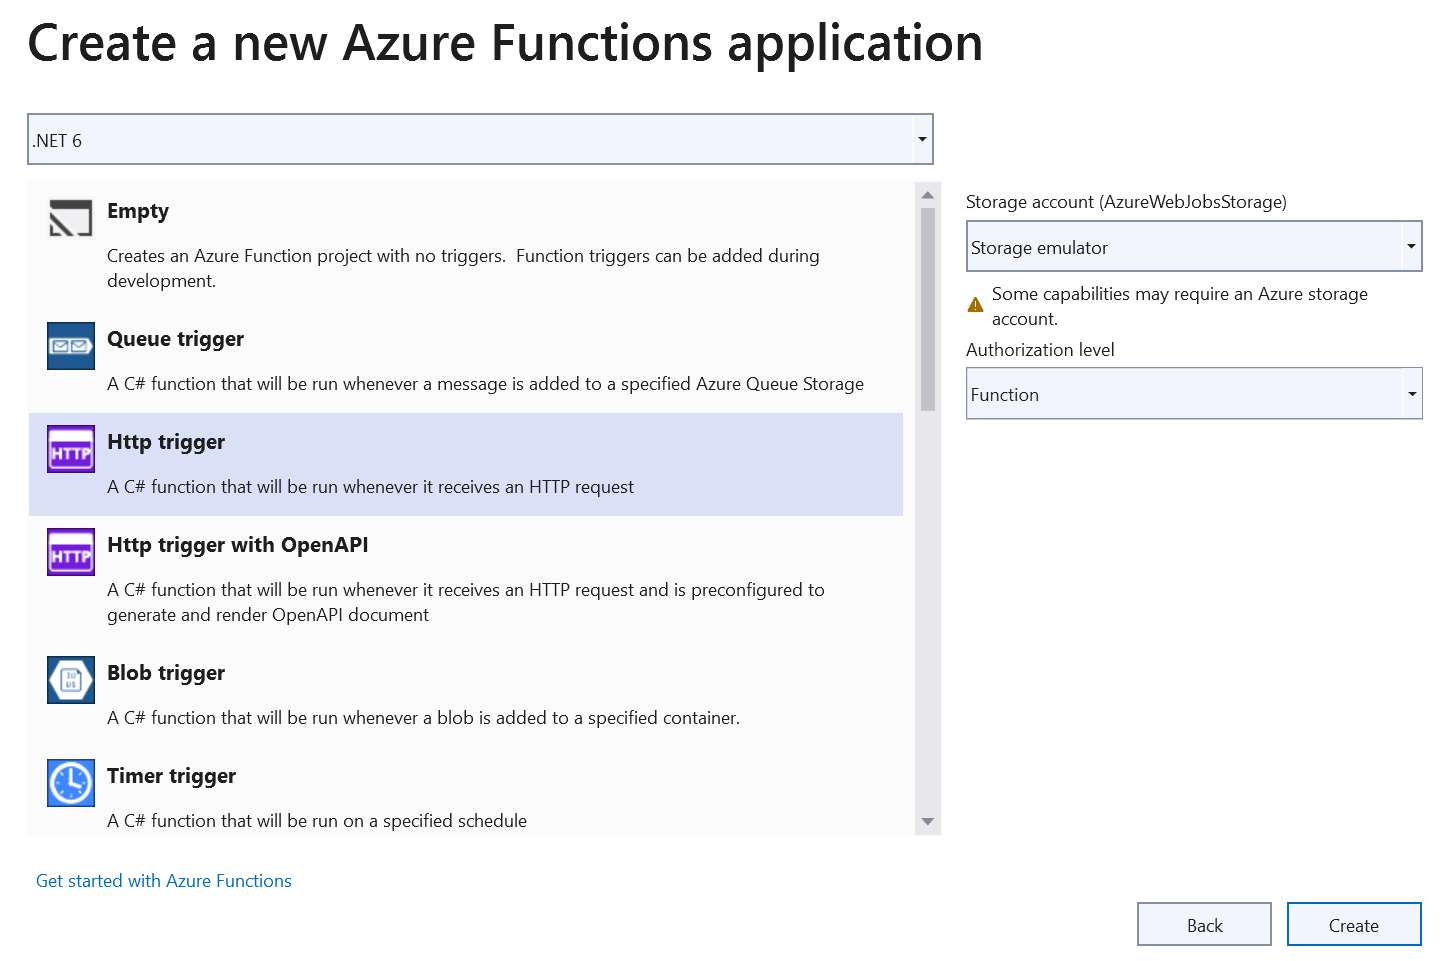
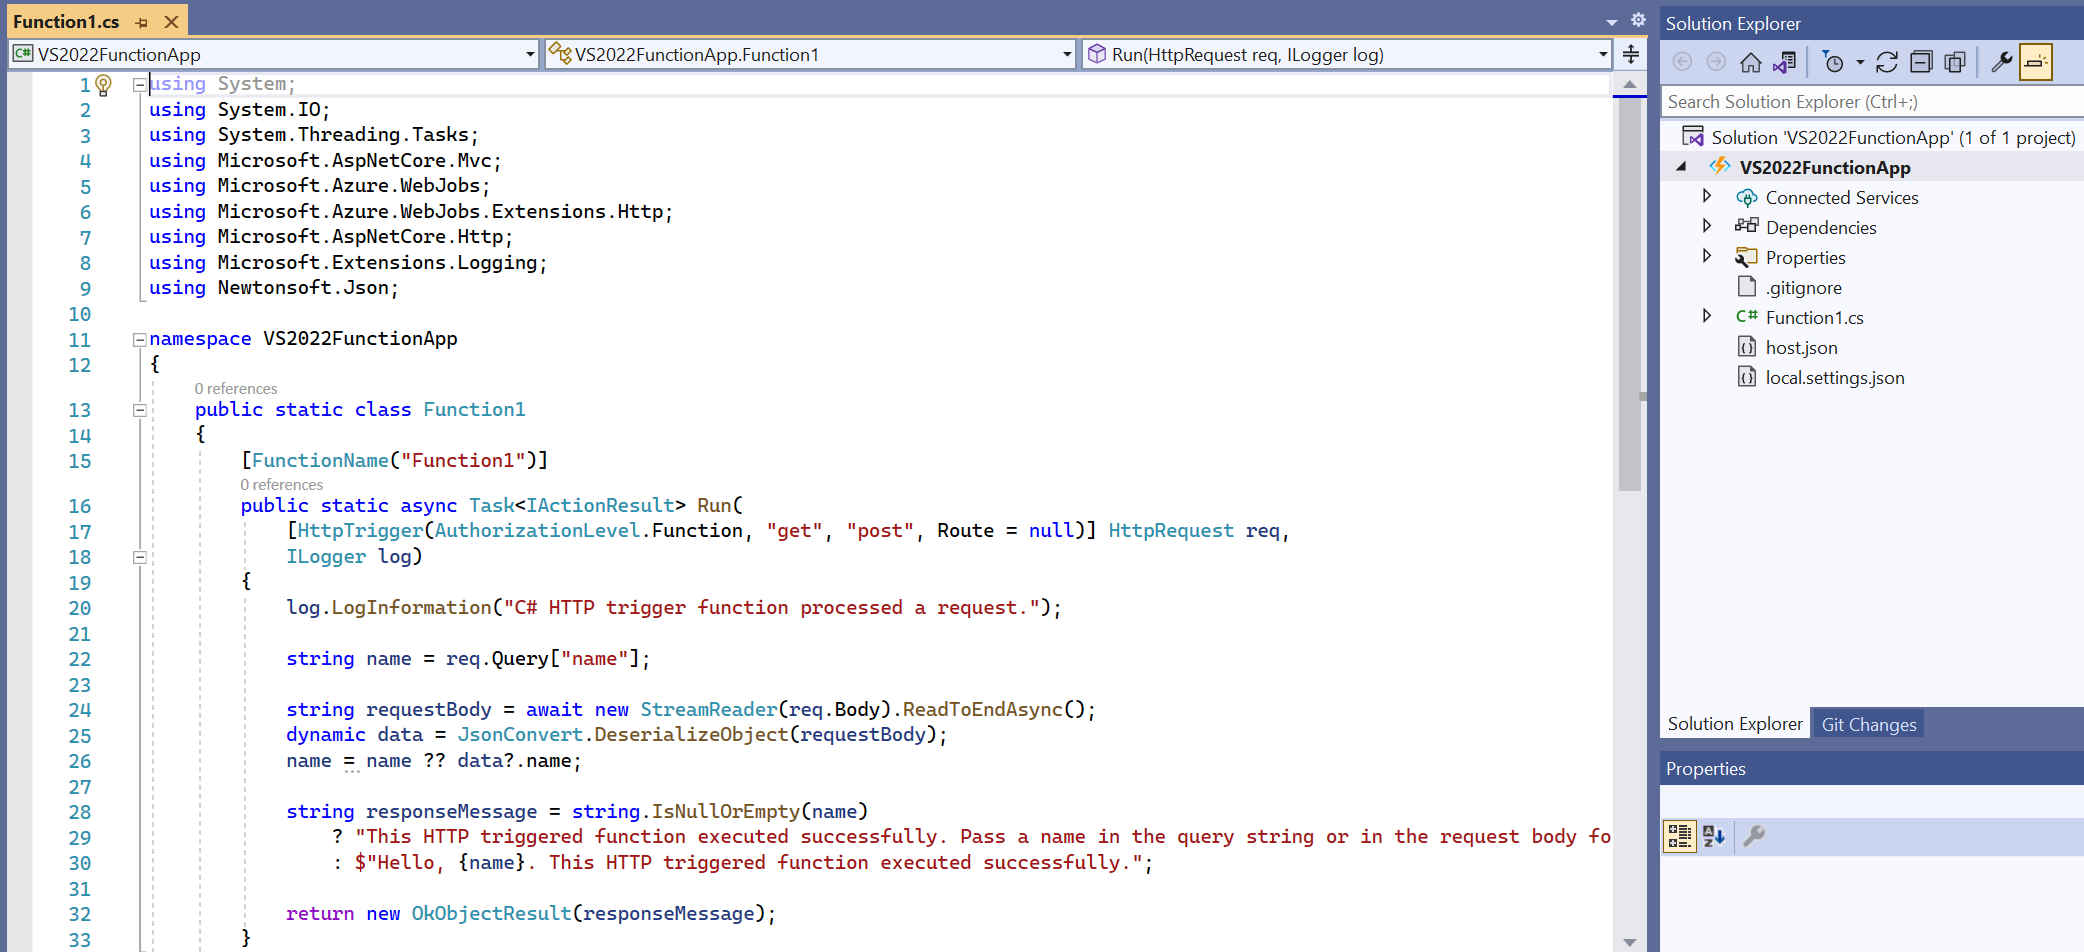
If you want to create an Azure Function in Visual Studio, do the following. We can create on in VS 2022. Create a new project:
This gives us similar options to Azure Portal:
And we get a similar block of code:
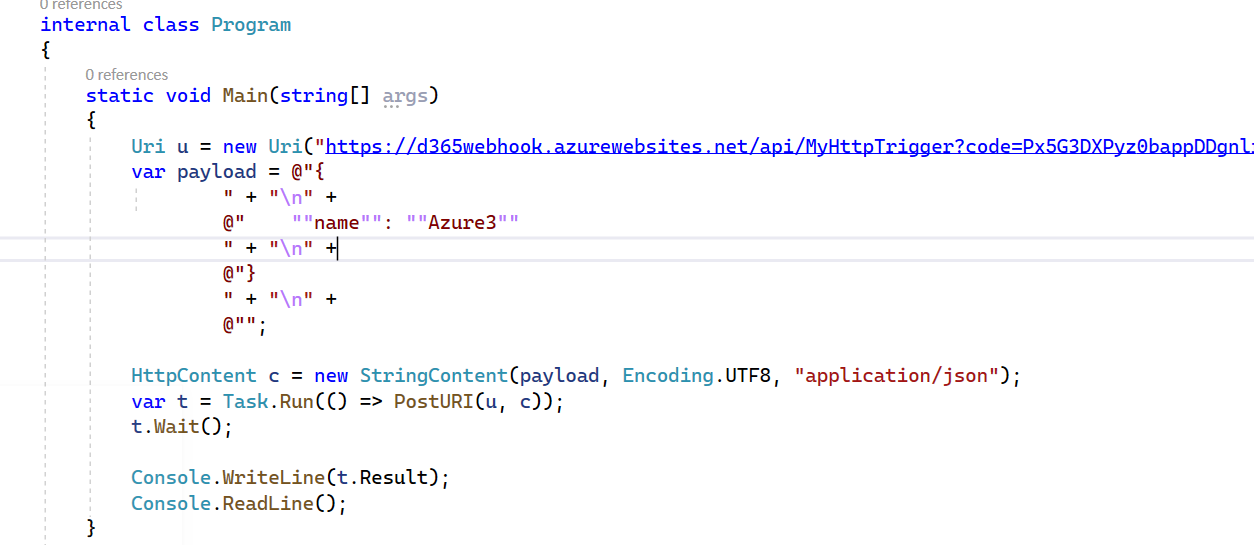
Another option to run the Azure Function or Power Automate is directly from a plugin, which you can do by calling PostAsync or similar methods.
To call the plugin using the PostURI method in the link above:
And to call the logic app:

Once the call has been made, you can make a call back to Dynamics 365 from the Azure Function or Power Automate, or do what you need to within the plugin.
The post Calling an Azure Function and Power Automate with D365 Webhook appeared first on Carl de Souza.