In this post, we will do a brief introduction to what is JWT, or JSON Web Tokens.
According to open standard RFC 7519, JWT is “a compact, URL-safe means of representing claims to be transferred between two parties”. The idea behind JWT is that a token can be created by a system, and that token can be verified to be true and unchanged by a 3rd party system. This means the 3rd party can then use the token to to allow a user with the token to perform actions in their system, such as reading specific data. A claim, which is passed in the token, is basically a statement that a person or organization makes about itself. For example, if I am logged into a system, my JWT token may have claims that say my name is Carl de Souza, my role is Admin.
A JWT token consists of 3 pieces:
- Header which contains the algorithm and token type
- Payload (data) which has claims
- Signature
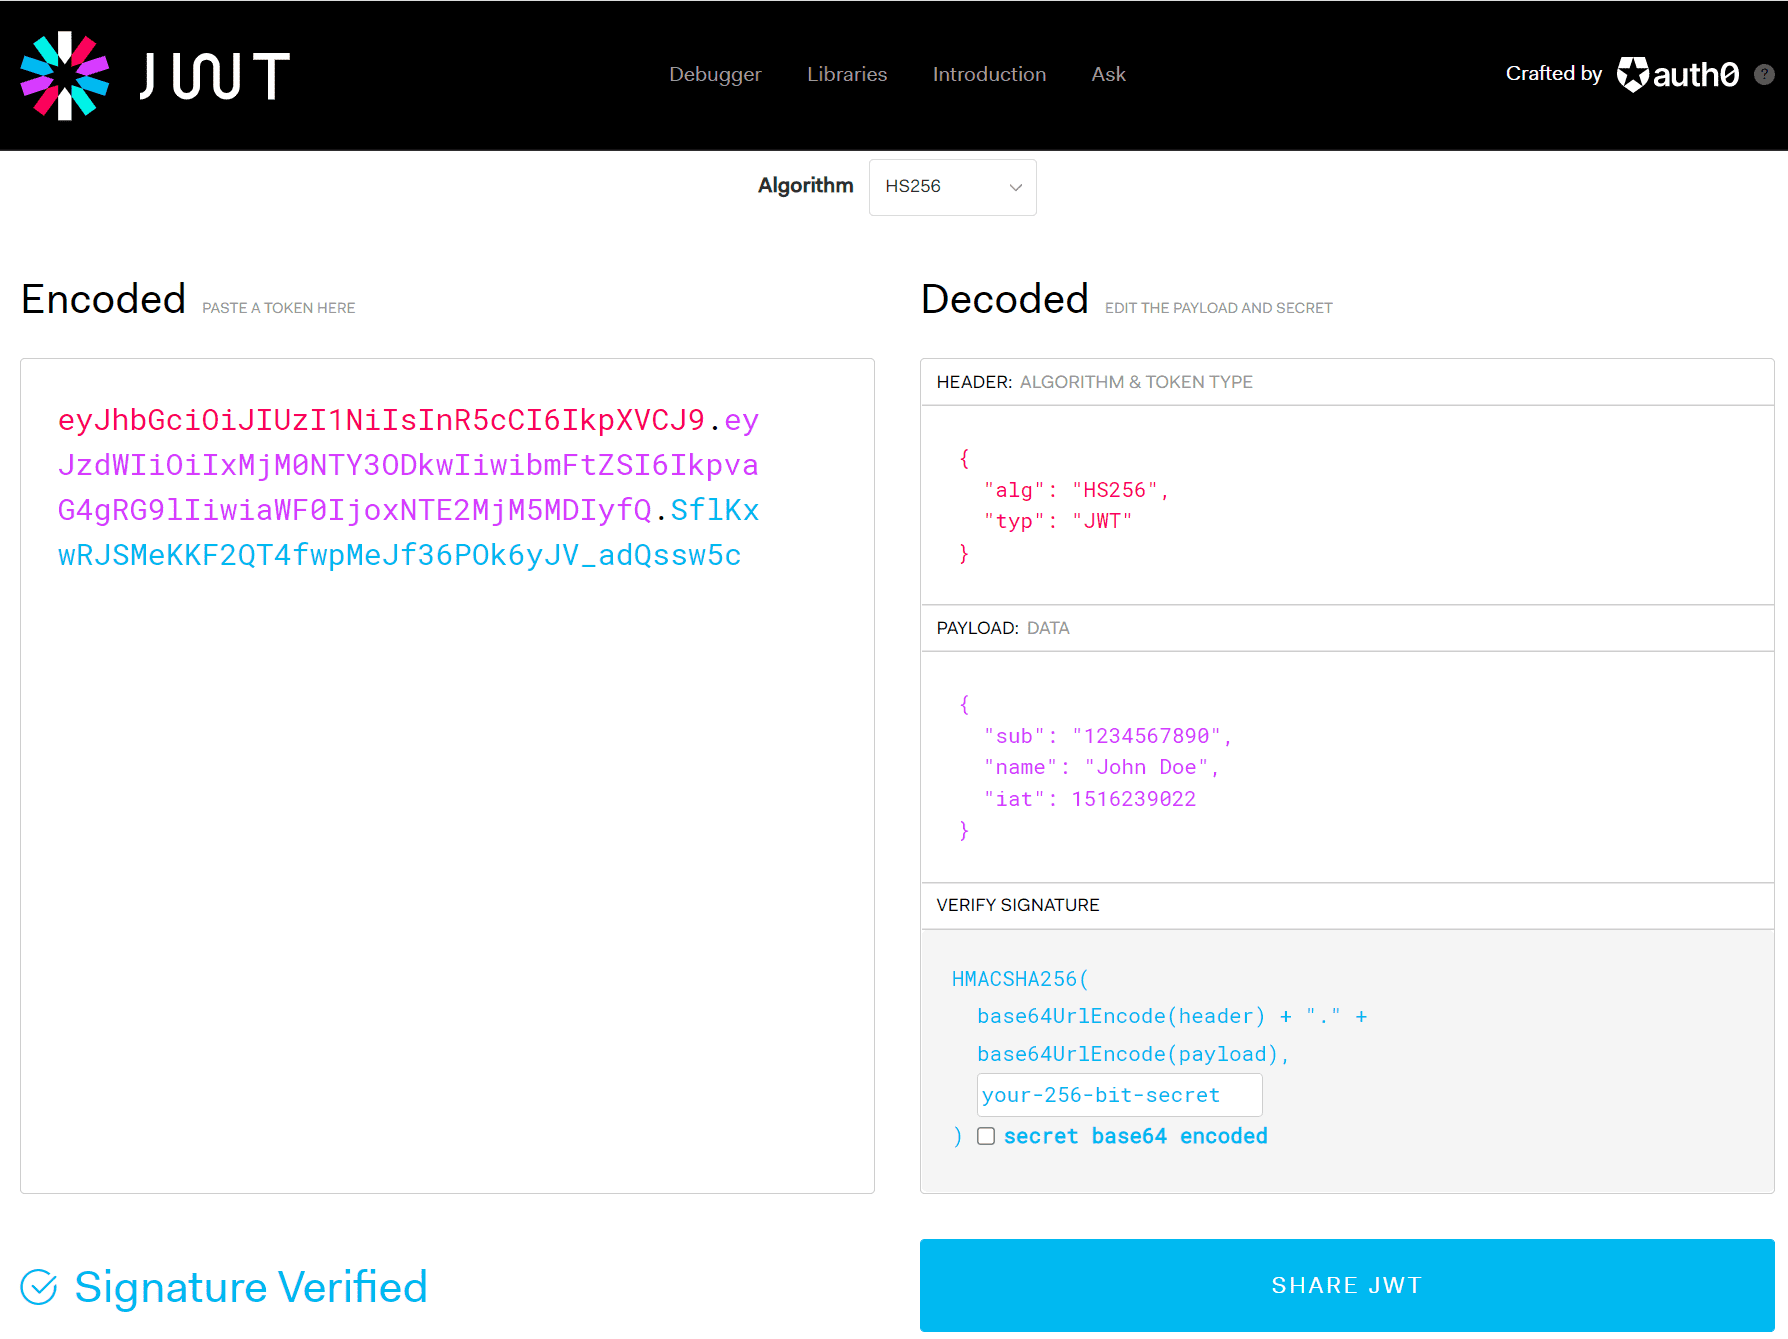
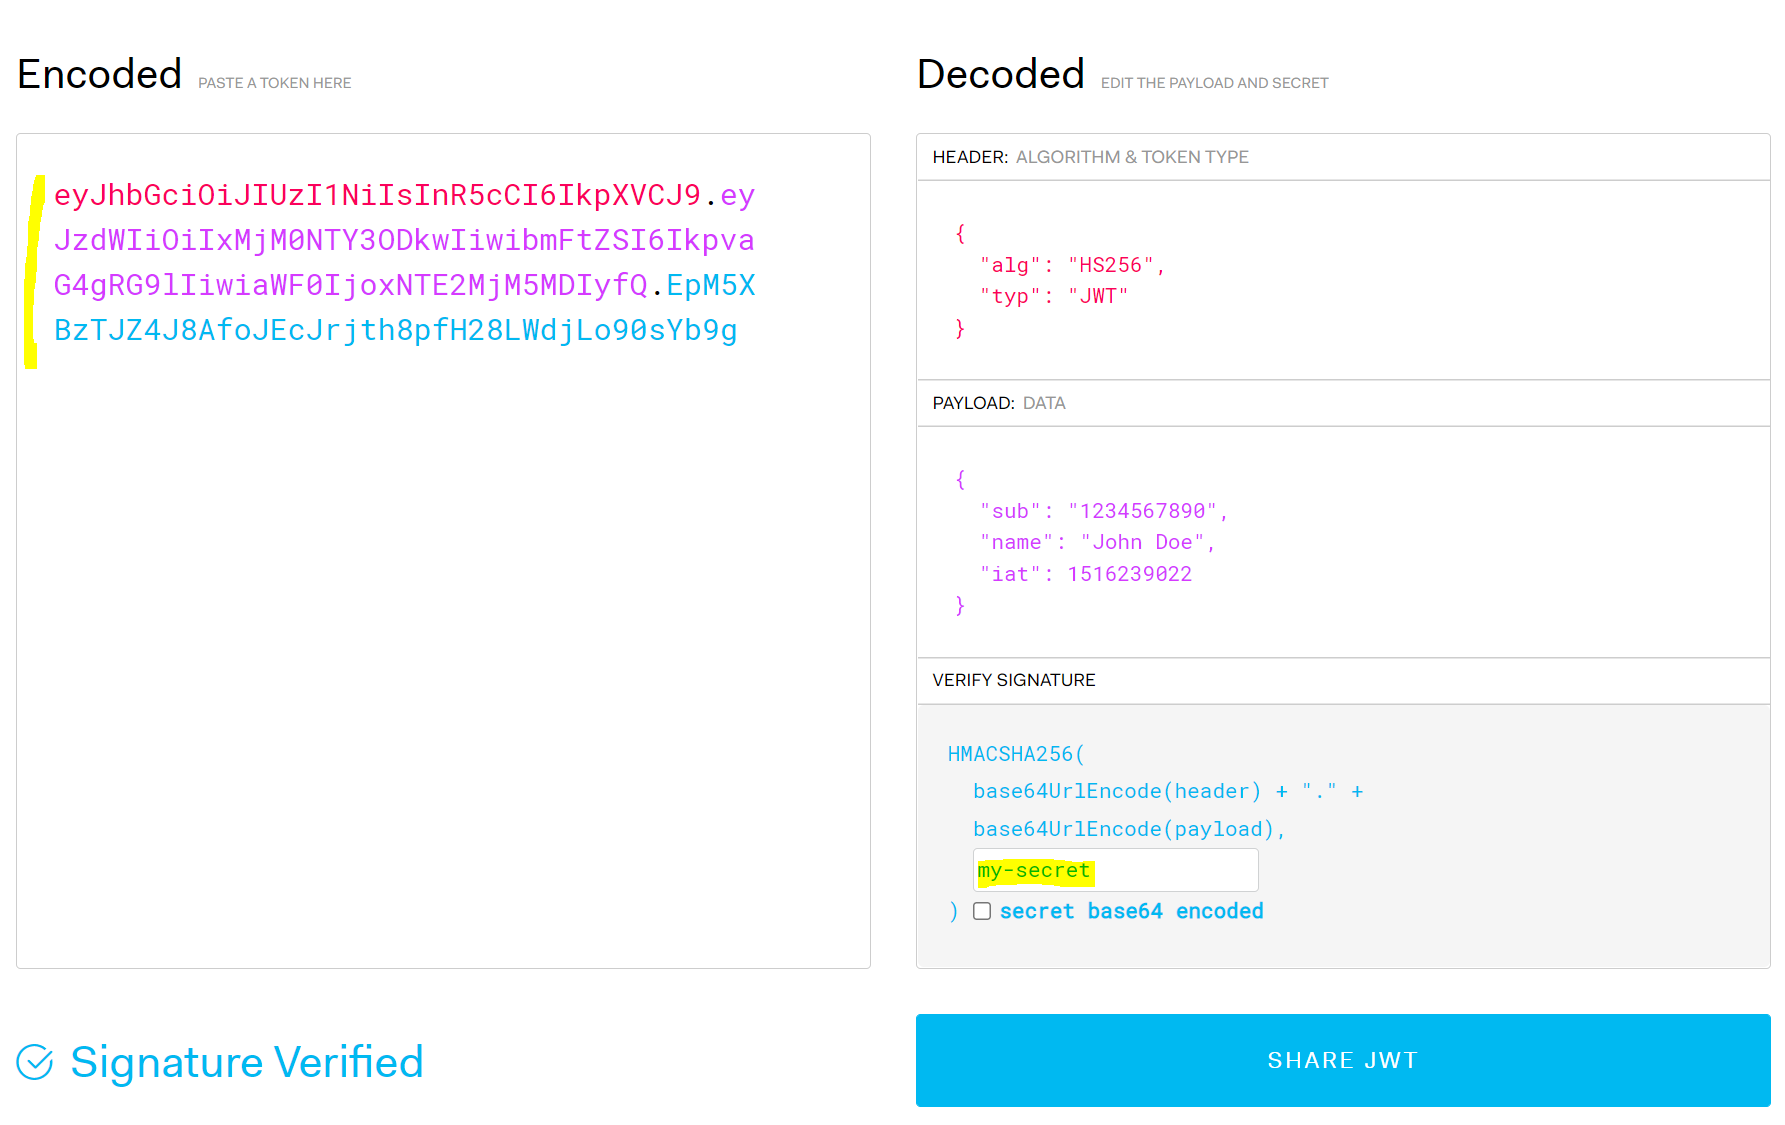
The website jwt.io allows you to generate, verify and decode JWT:

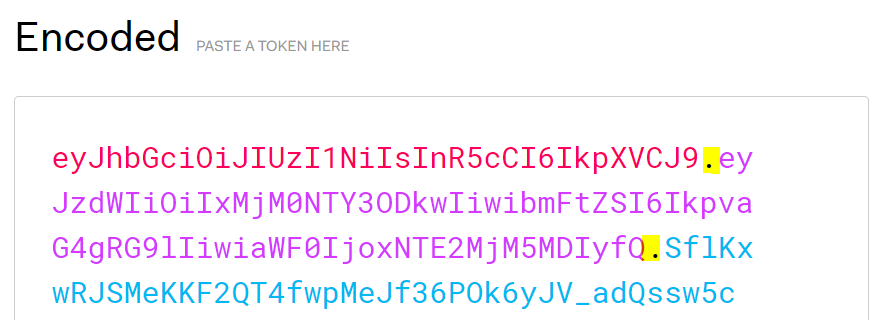
We can see above the encoded JWT token on the left. Note the 3 sections (header, payload, signature) are separated by a period/dot, which allows anyone reading the token to split it into the 3 sections:
Let’s look at each of the pieces.
Header
As mentioned, the header consists of the algorithm and the token type. The algorithm is used to sign the token (we will see how Signing works in the signing section below):
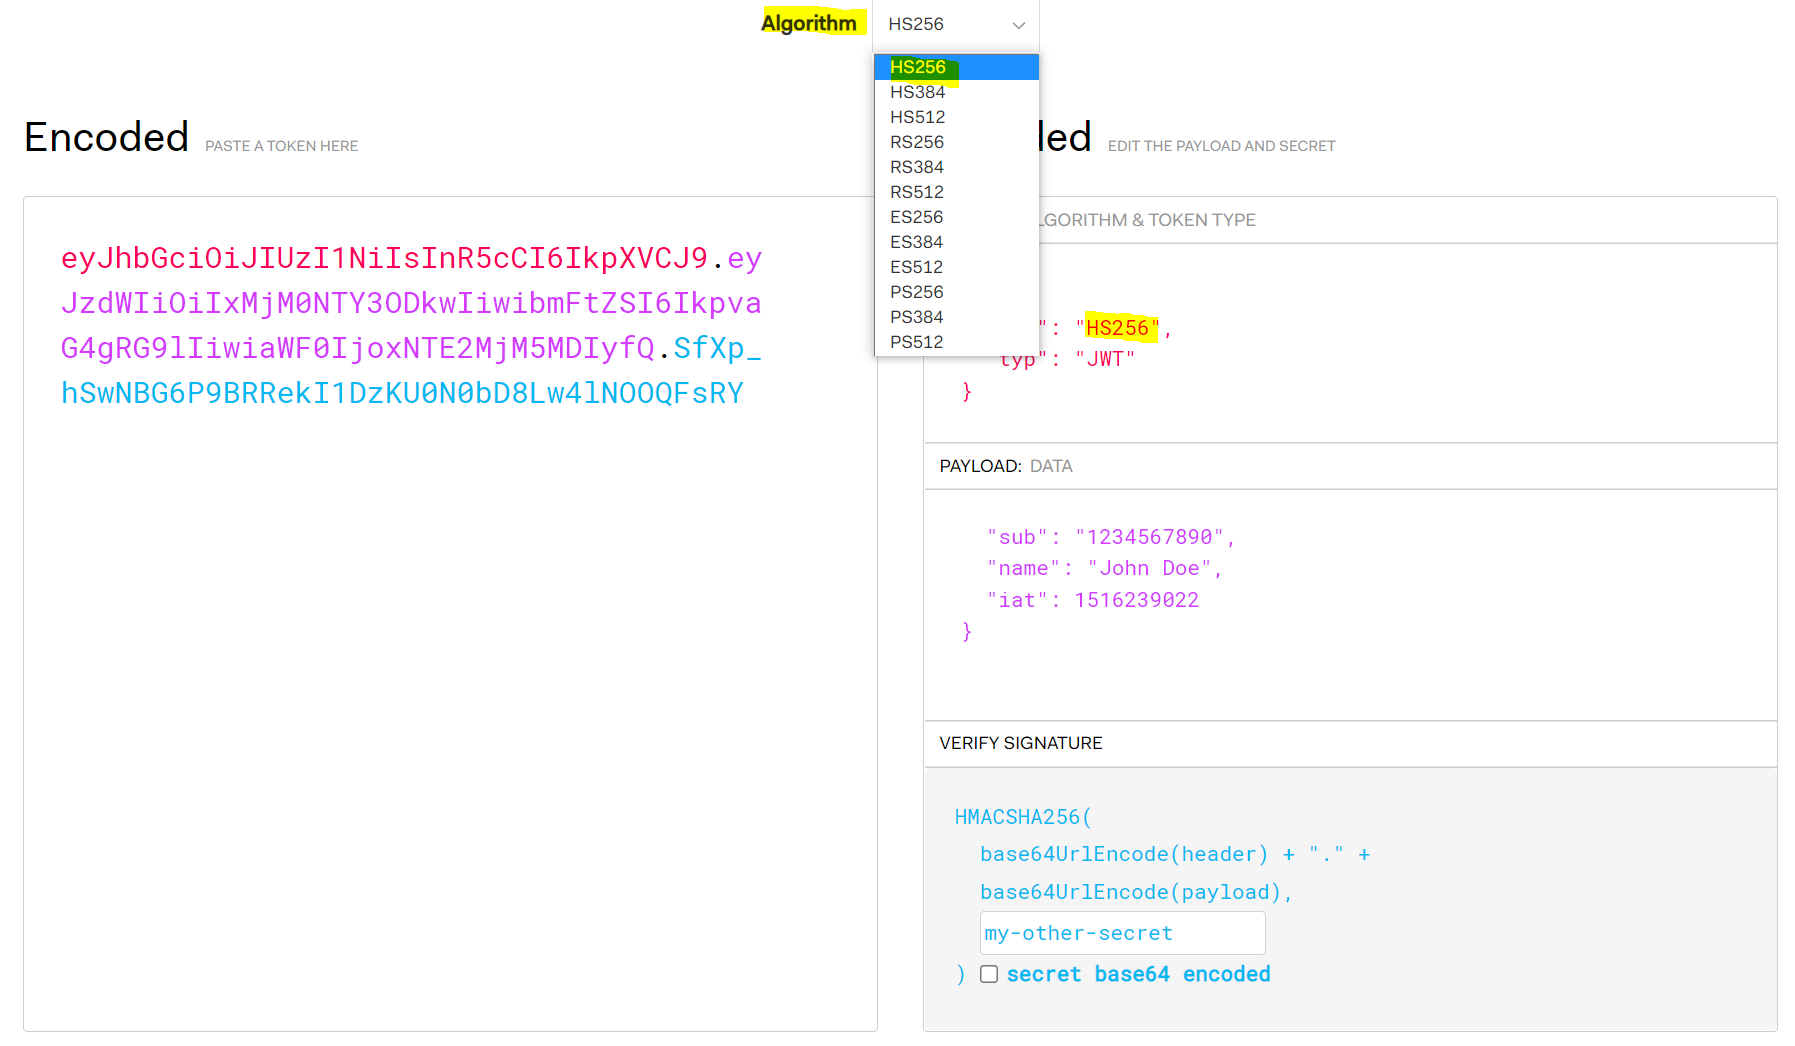
The common signing algorithms used are HS256 and RS256, though you can see many others are supported. HS256 is a symmetric algorithm (it uses a shared secret). RS256 is asymmetric (it uses public and private key pair). If you change the type of algorithm on the jwt.io website, you will see in the Verify Signature box the shared secret or public/private key fields are displayed.
Note JWT is about digitally signing data, not encrypting it. JWE, or JSON Web Encryption, is another topic that handles encryption aspects of JWT.
A JWT token is encoded using base64url encoding (slightly different from base64 encoding).
Payload
The JWT payload contains the claims. This can basically be anything the system decides to include. Common examples include the user’s name, email address, and what their role or what they have access to. You can see above, the token contains sub, name and ist attributes.
Signature
Signing a JWT token means it can be verified and trusted. You can see below, the secret I provided is called “my-secret”, and the resulting token is created on the left:
If the secret was different, the token would look different:
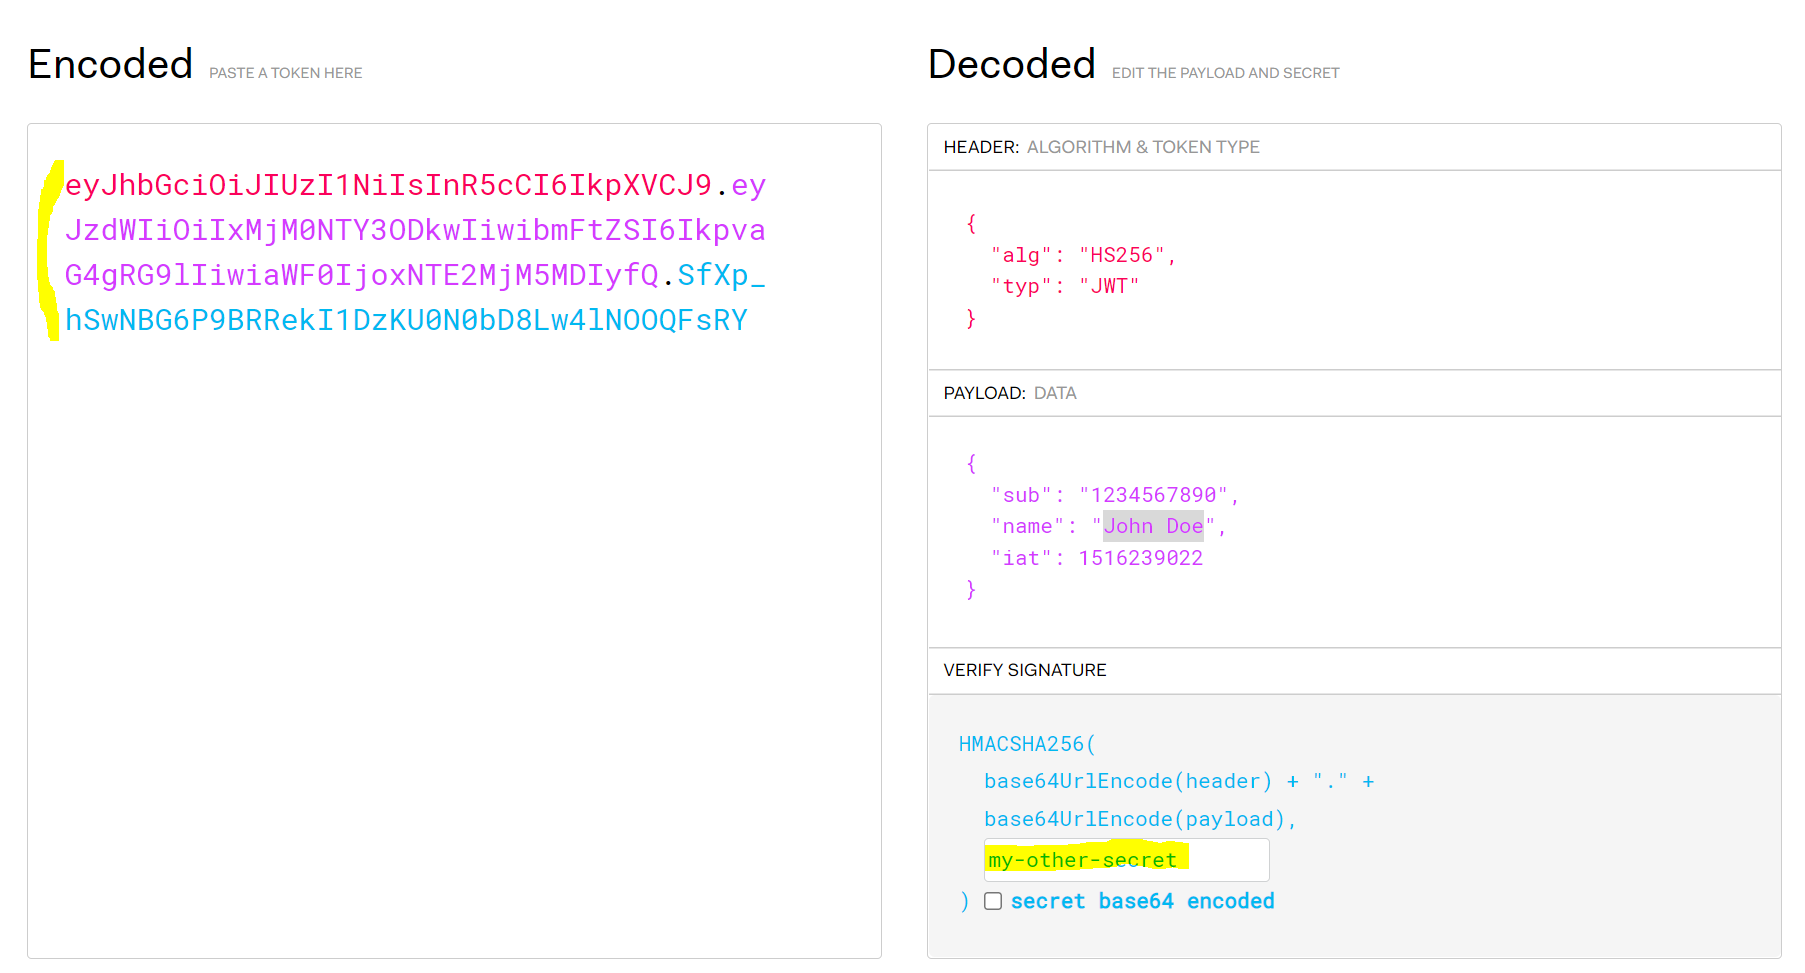
With JWT, the secret is only stored on the server, so only the server can generate a signed token that can be trusted. If anyone else created a token and signed it using their own secret/keys, it would not be trusted by a 3rd party as the 3rd party can and should verify the JWT passed in is correct through the public key of the known server.
We can see the steps to create a JWT token:
- Create a header and encode it using base64url
- Create a payload and encode it using base64url
- Provide a secret or key and sign then token using the chosen algorithm (HS256, RS256 etc). The signature may or may not be base64url encoded
That’s an introduction to JWT. In the next post, we will look at using JWT with Power Apps Portals.
I AM SPENDING MORE TIME THESE DAYS CREATING YOUTUBE VIDEOS TO HELP PEOPLE LEARN THE MICROSOFT POWER PLATFORM.
IF YOU WOULD LIKE TO SEE HOW I BUILD APPS, OR FIND SOMETHING USEFUL READING MY BLOG, I WOULD REALLY APPRECIATE YOU SUBSCRIBING TO MY YOUTUBE CHANNEL.
THANK YOU, AND LET’S KEEP LEARNING TOGETHER.
CARL