In previous posts, we created PCF field controls, which are controls that attach to Power Apps fields. In this post, we will look at how to create dataset PCF controls, which replace datasets in Power Apps and Dynamics 365.
To do this, let’s create a new folder called SampleDatasetControl and initialize the project using the command. Note the -t dataset for the dataset template:
pac pcf init -n SampleDatasetControl -ns carl -t dataset
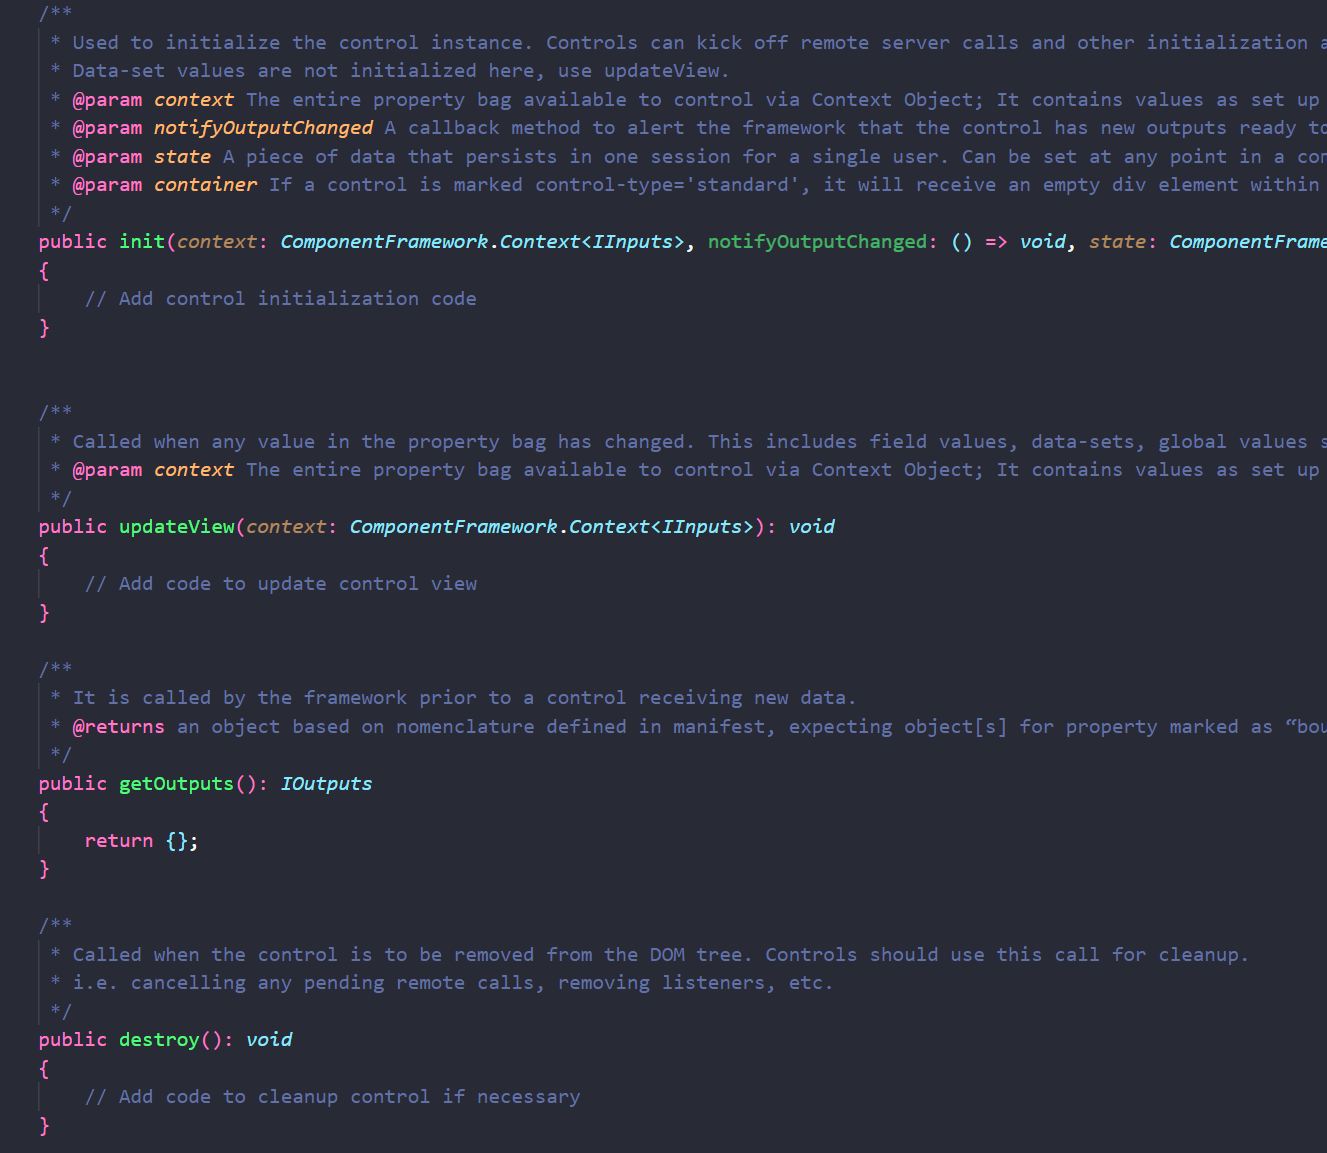
Let’s open this in VS Code. In the index.ts file, the import area looks a little different to the field template, we have a couple of new lines regarding the DataSetApi:

Generally the rest of the index.ts file looks the same as the field template, with the methods init, updateView, getOutputs, and destroy.
In the ControlManifest.Input.xml we see the control:

The big difference in the manifest is the data-set area:

Let’s build this with:
npm run build
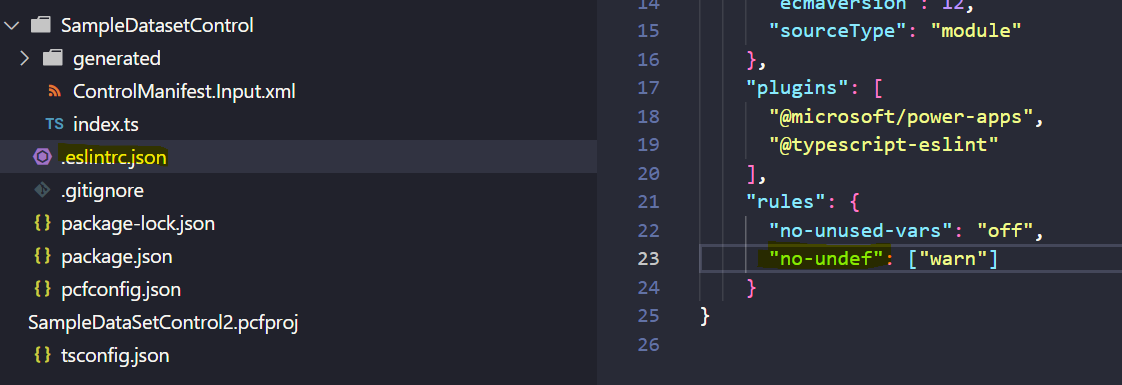
Note if you run into the error ‘PropertyHelper’ is not defined no-undef you can resolve this by changing the .eslint.rc.json file to include a new line for “no-undef”: [“warn”] under the rules section:
And run this in our test harness with:
npm run start
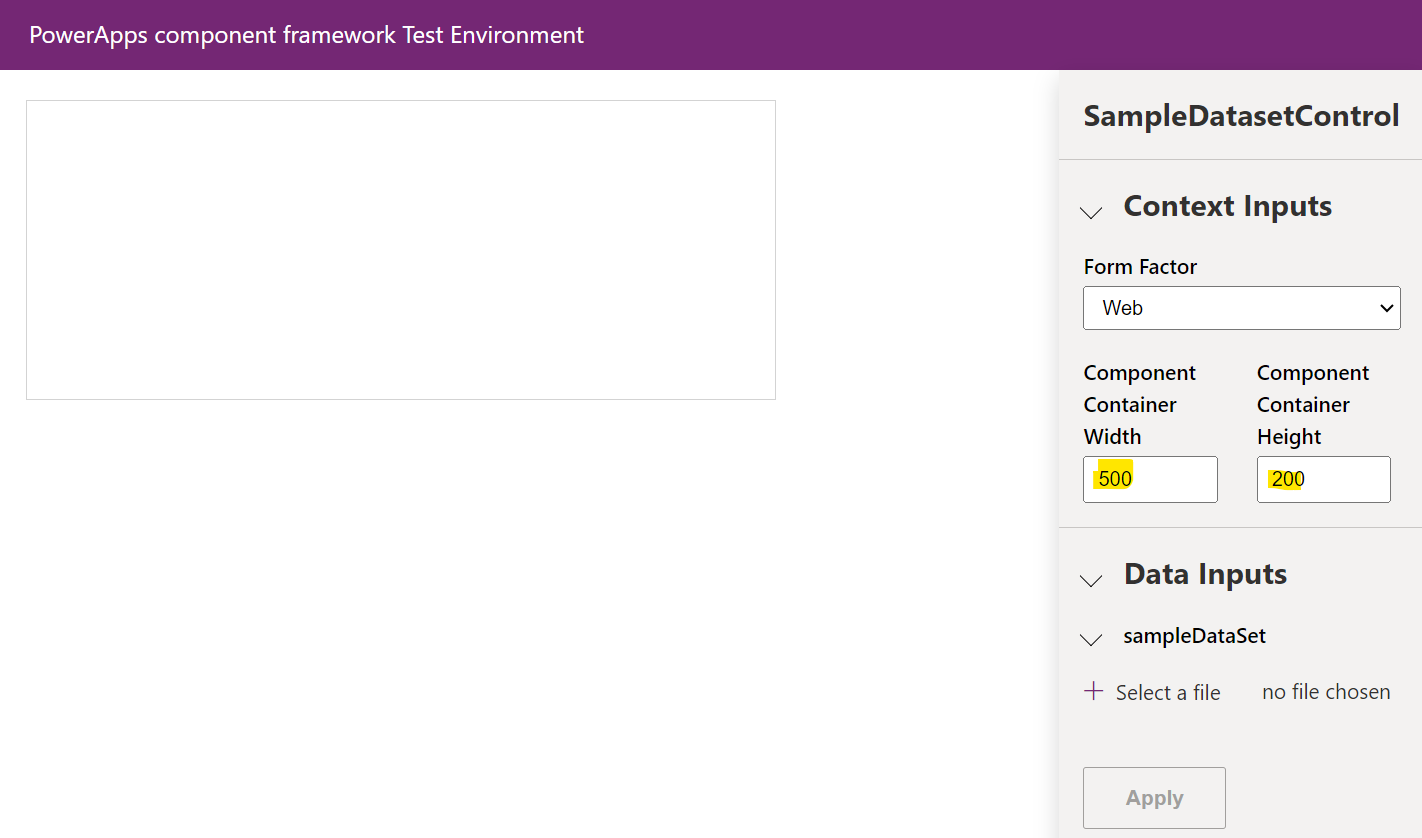
We see our test harness launch. Let’s change the size of the control, and notice the option below that to select a sampleDataSet:
Clicking on this shows it accepts csv files:
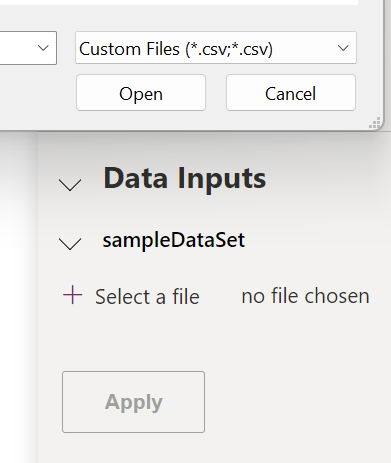
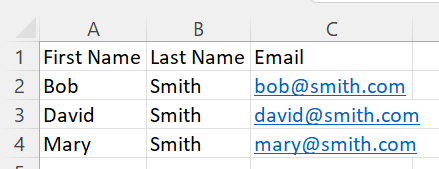
Let’s upload the file a simple CSV file below:
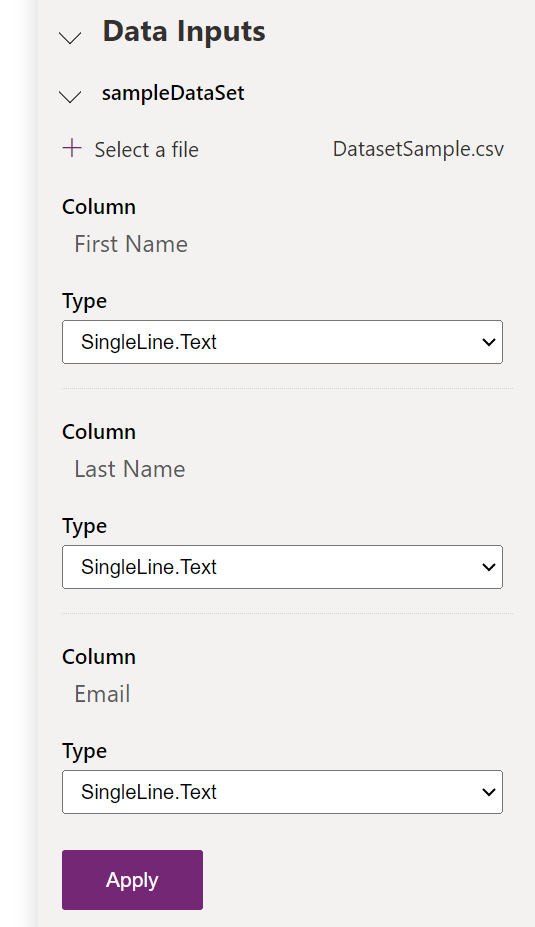
We now get to assign the data types to each field:
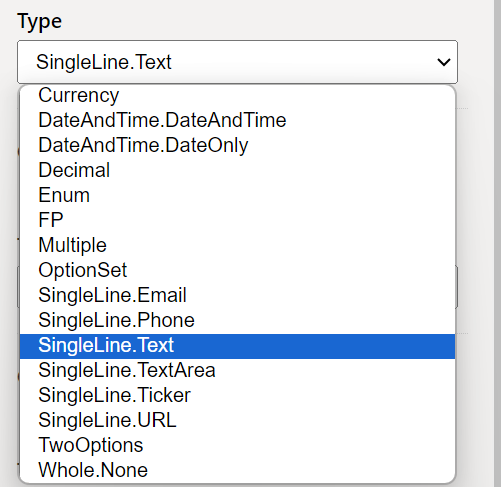
Note the different data type options:
At this point, nothing is displayed in our grid:
We’ll need to add some code to render the dataset. Let’s add some code. As with the field component we have an HTMLDivElement container:

Simply speaking, we have a component where we could put anything to display, it doesn’t have to be a grid, but of course we’re using this template because we want to display a grid. Let’s show as an example that we could return here a text field just like the field control:

This displays our text box in the test harness:
Let’s deploy this up to an org and see what it looks like as a label. We will go through the same deployment process as when deploying a field control.
First, let’s package our component. I will create a subdirectory called Solution, go into it and then run the command:
pac solution init --publisher-name Carl --publisher-prefix carl
Next, add references to where our component is located:
pac solution add-reference --path C:\PCF\SampleDataSetControl2
Now run the below in the Solution directory:
msbuild /t:build /restore
Now connect to your org:
pac auth create --url https://org876ac311.crm.dynamics.com/
And from the component folder (not the Solution folder) do push:
pac pcf push --publisher-prefix carl
Now let’s go to the Power Apps maker portal and to a form. We will add a subgrid:
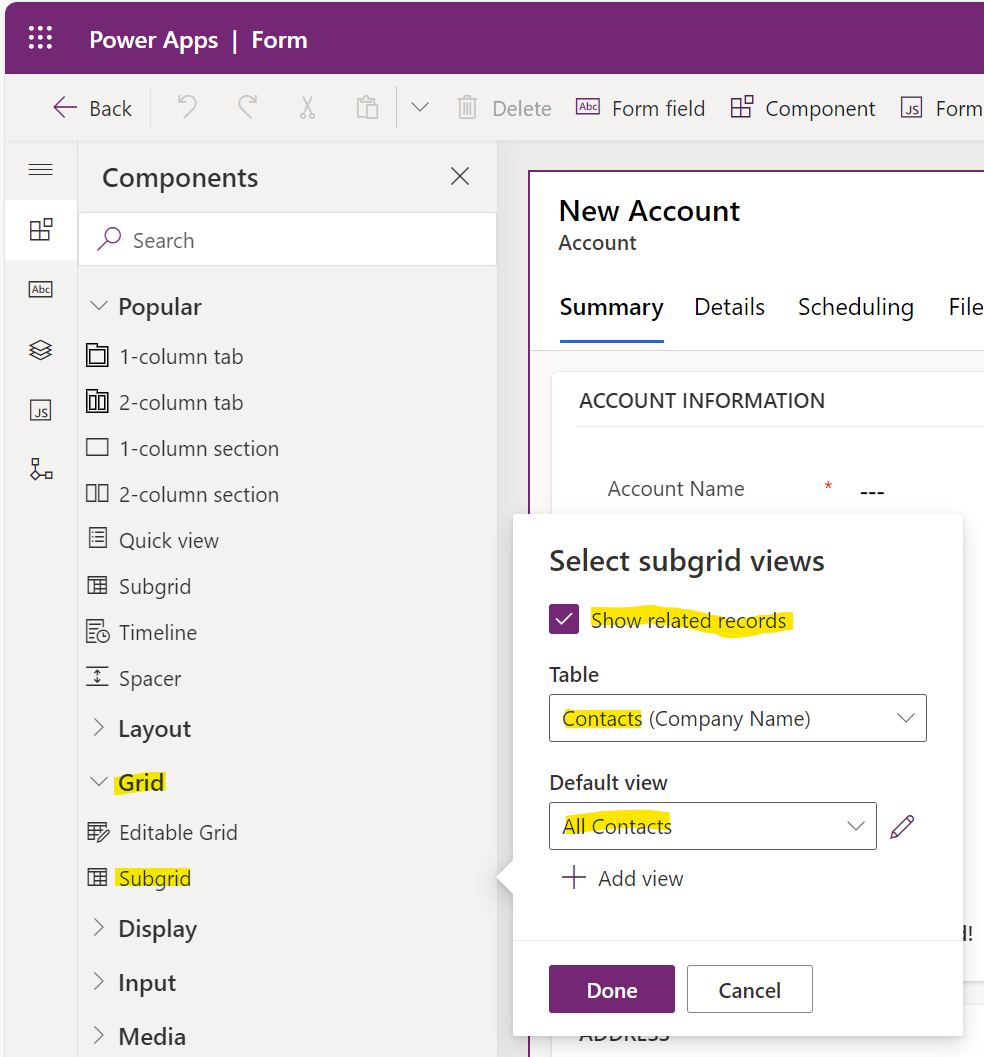
Our new subgrid appears on the form:
Now let’s wire our subgrid to our custom control:
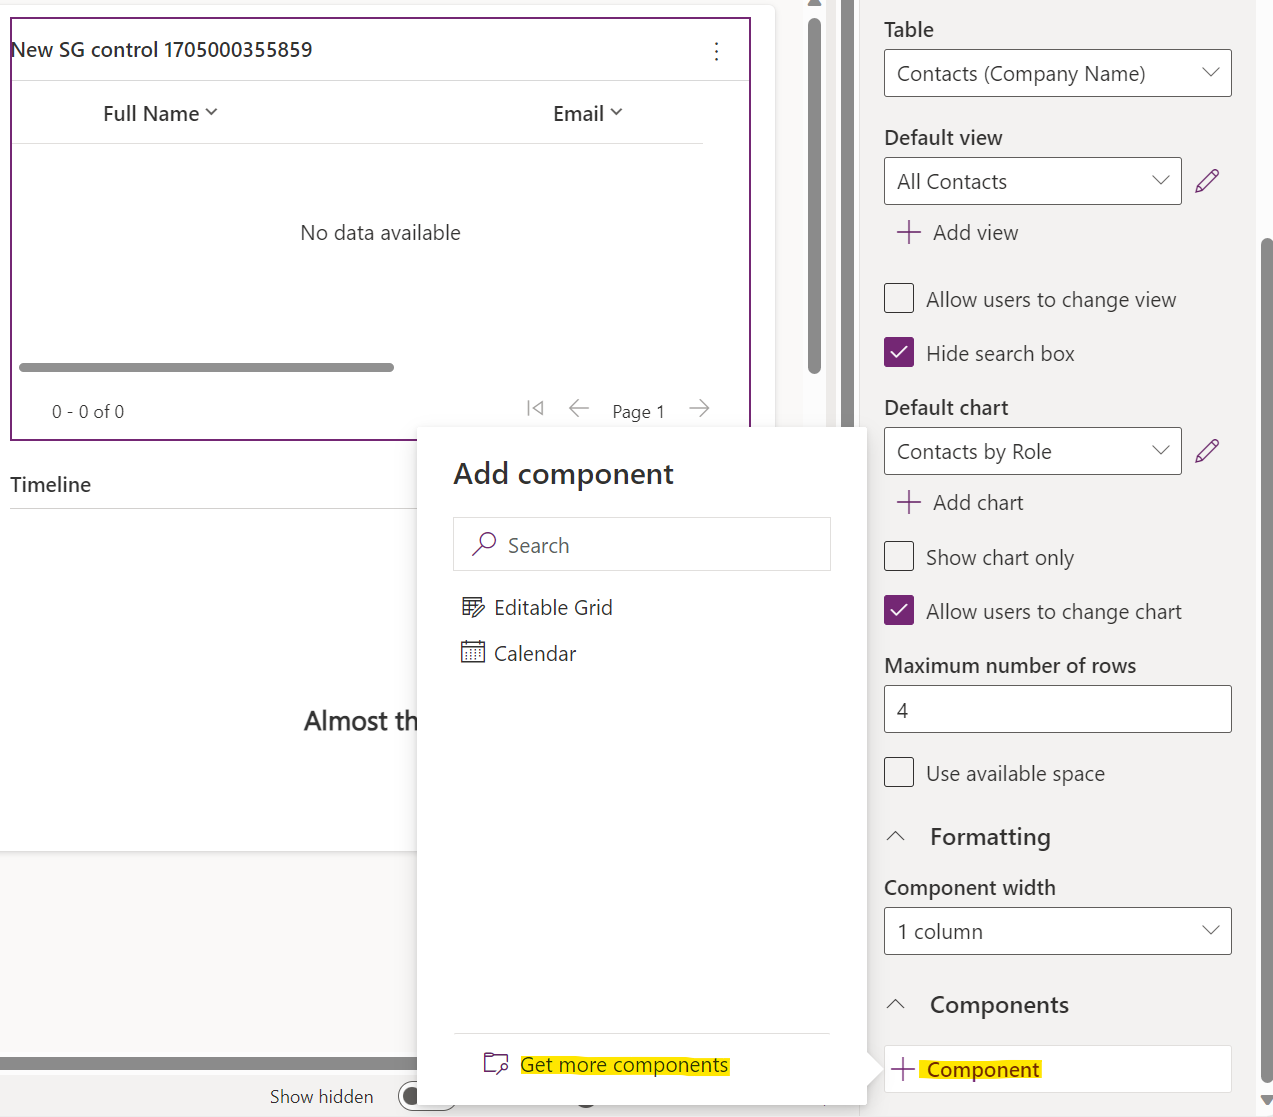
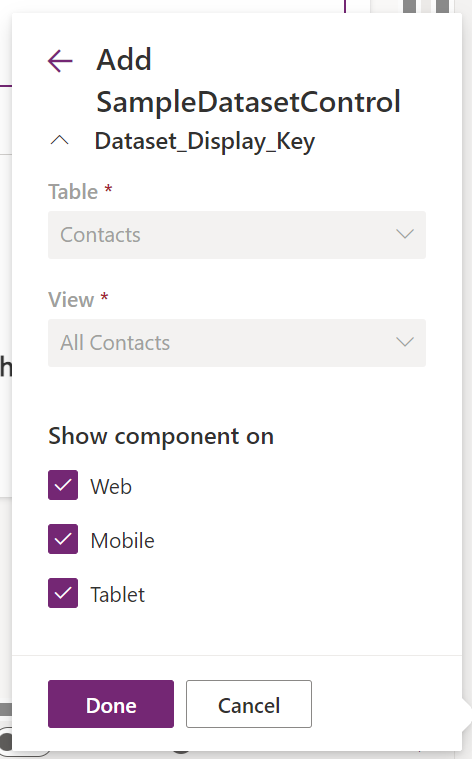
Select our new SampleDatasetControl:
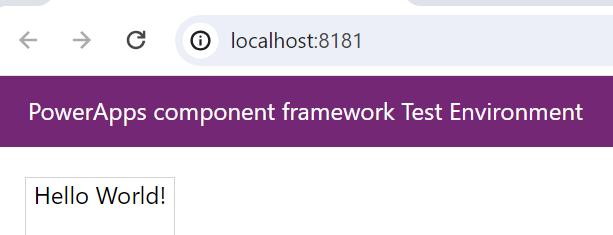
Select it again and click Done:
Right away we see our Hello World coming through:

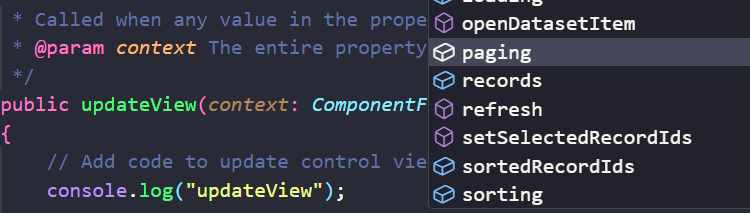
Now that we see the dataset control is simply another control, let’s look at how to wire it into a subgrid. Let’s see what our context parameters gives us for datasets. We see in context.parameters.sampleDataSet we get a few useful properties:
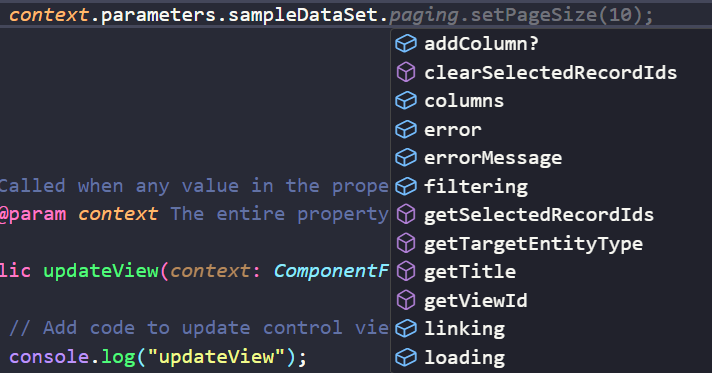
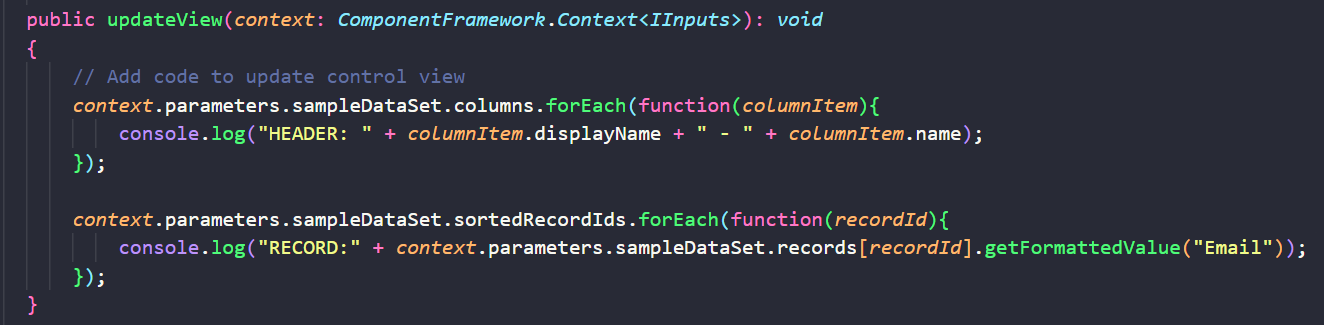
Let’s write out the columns to the console using the following code, and let’s add it to the UpdateView:
context.parameters.sampleDataSet.columns.forEach(function(columnItem){ console.log("HEADER: " + columnItem.displayName + " - " + columnItem.name);
});
And we will write out the email addresses of each record using the code below:
context.parameters.sampleDataSet.sortedRecordIds.forEach(function(recordId){ console.log("RECORD:" + context.parameters.sampleDataSet.records[recordId].getFormattedValue("Email"));
});
It should look like below:
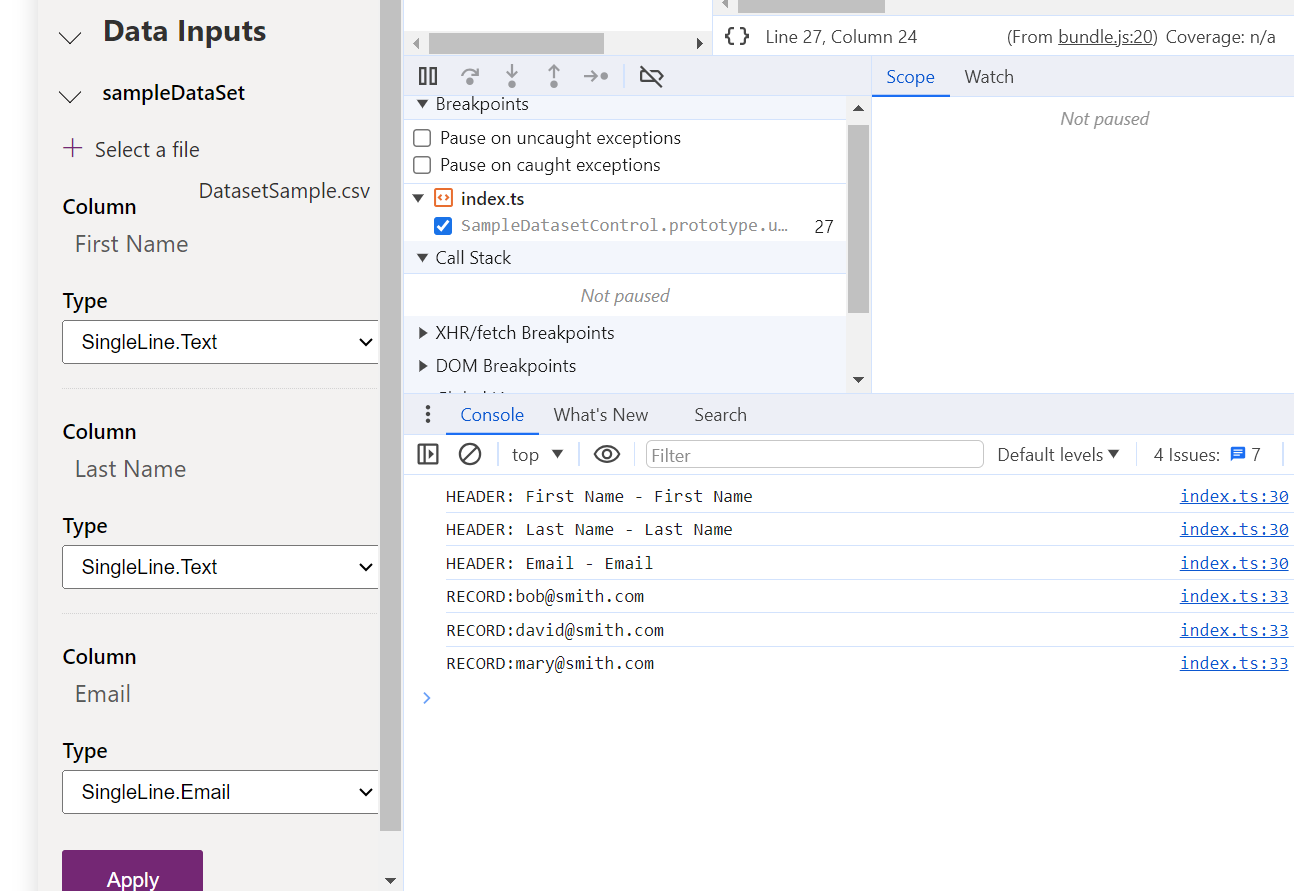
Now let’s test this. In our test harness, upload the CSV file again. We see in the console our header and records are now printing out from our CSV file!
OK, let’s actually display this data in place of the grid. We will create a variable below to hold our container:
private _container : HTMLDivElement;

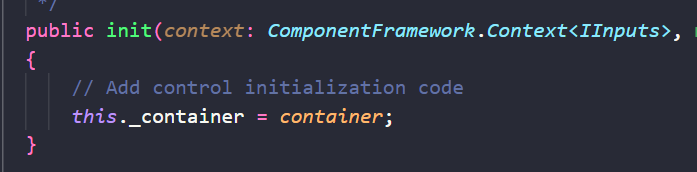
And let’s initialize this in our init:
this._container = container;
And to the updateView let’s add the code below. The code basically takes our container, and firstly sets it to blank to wipe out any older rendering. We then go through each of the columns like above and attach them to a row in a new table. We then go through each of the records in sortedRecordIds to display each record (getting the column names as well). We then append our table to the container just like in other PCF examples:
this._container.innerHTML = ""; // Add code to update control view var table = document.createElement("table"); var tr = document.createElement("tr"); context.parameters.sampleDataSet.columns.forEach(function(columnItem){ var td = document.createElement("td"); td.appendChild(document.createTextNode(columnItem.displayName)); tr.appendChild(td); table.appendChild(tr); }); context.parameters.sampleDataSet.sortedRecordIds.forEach(function(recordId){ var tr = document.createElement("tr"); context.parameters.sampleDataSet.columns.forEach(function(columnItem){ var td = document.createElement("td"); td.appendChild(document.createTextNode(context.parameters.sampleDataSet.records[recordId].getFormattedValue(columnItem.name))); tr.appendChild(td); }); table.appendChild(tr); }); this._container.appendChild(table);
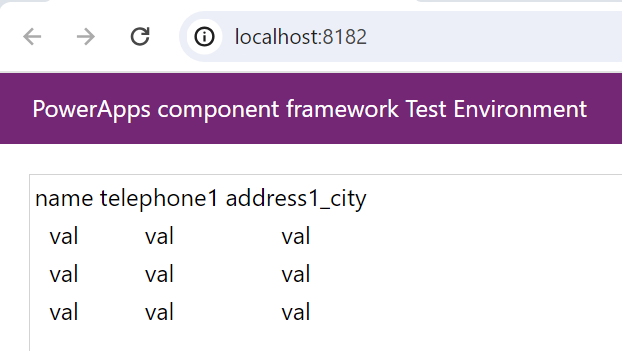
When we run this the first time in our harness we get the following displayed, with name, telephone1, and address1_city. This appears to be a background sample in the developer tools, not our sample:
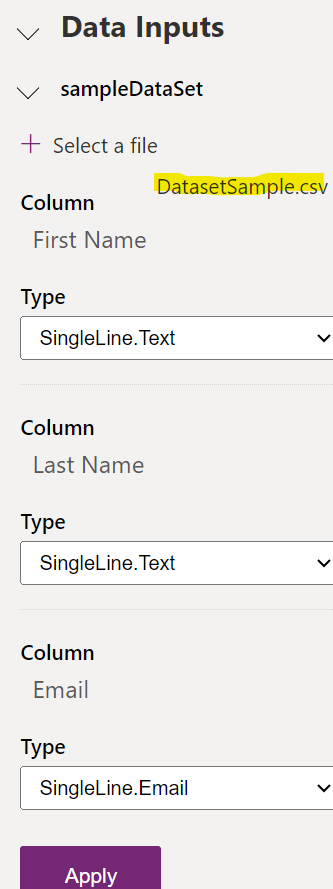
We can select our dataset on the right, like above and make sure the field types are set, then click Apply:
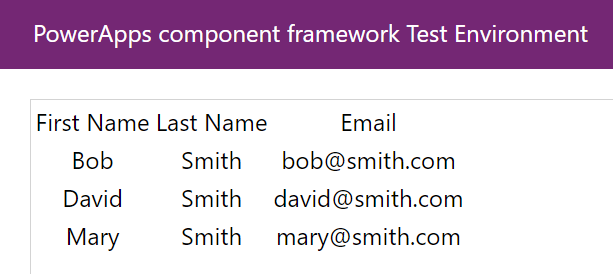
Once Apply is clicked our dataset is rendered:
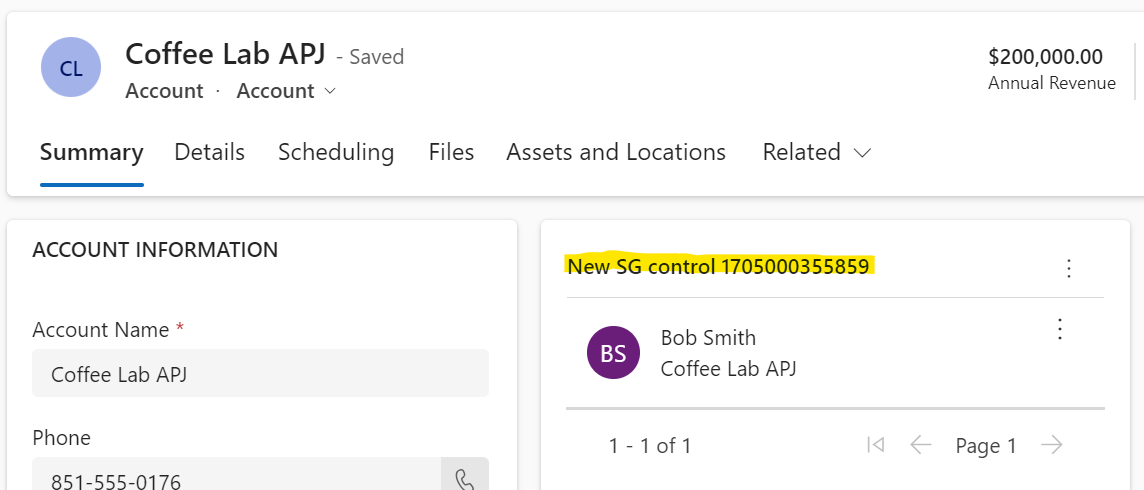
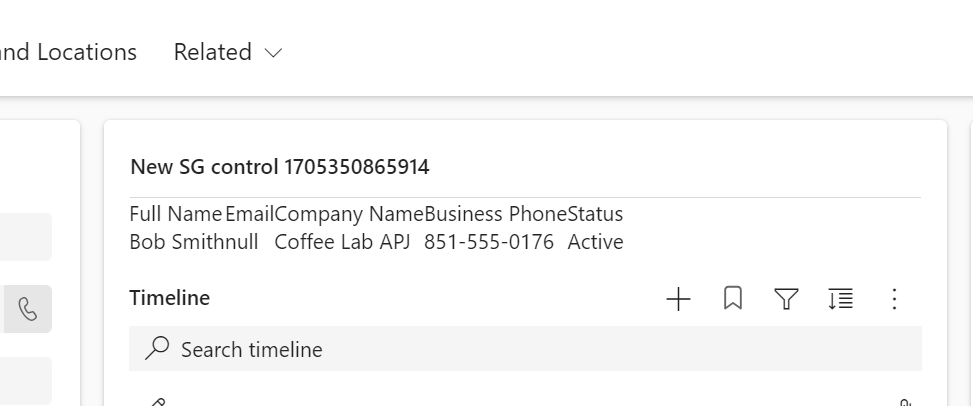
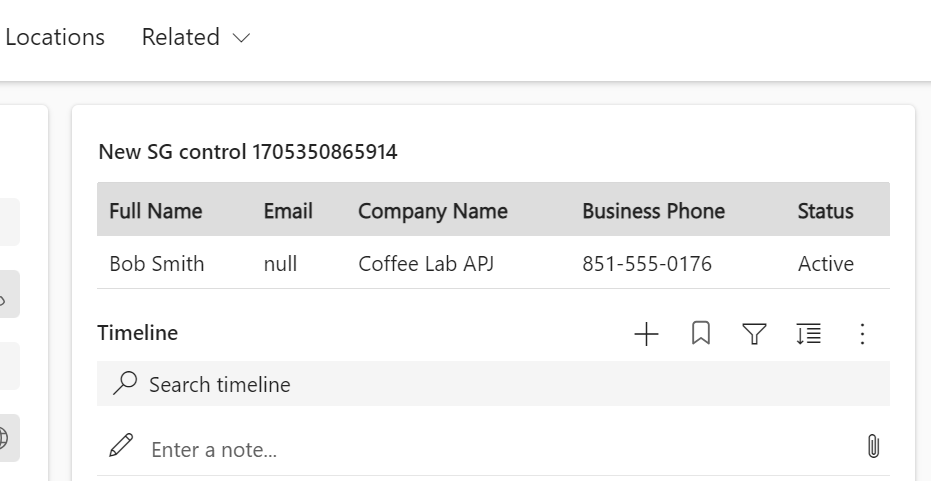
Let’s deploy this back up to Power Apps and take a look. We can see our new subgrid control displays the fields from the view and the rows from the view (1 record in this case):
This doesn’t look so good visually, so let’s add a CSS to our code.
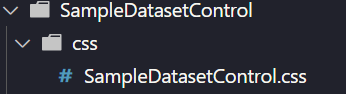
In our ControlManifest.Input.xml we will uncomment the line for the CSS under Resources. Note the path to the folder by default is css/SampleDataSetControl.css:

We will create a file and folder in this location:
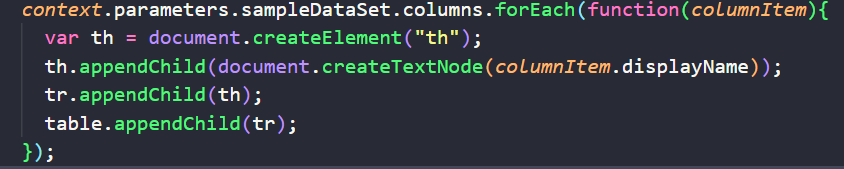
And let’s tweak our code a little, we will change our header creation in the updateView to be th instead of td:
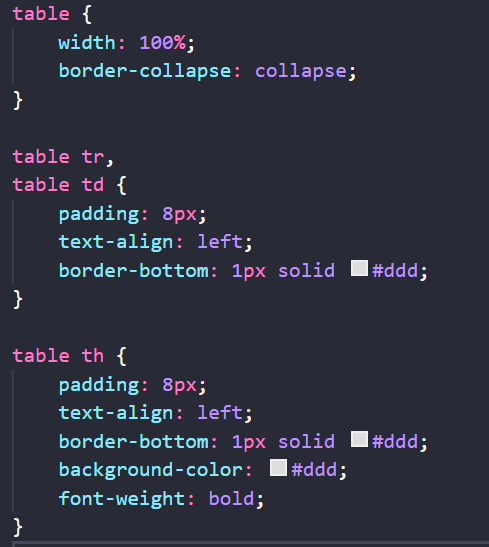
Now our css, a simple styling for our table:
Our test harness now looks like:
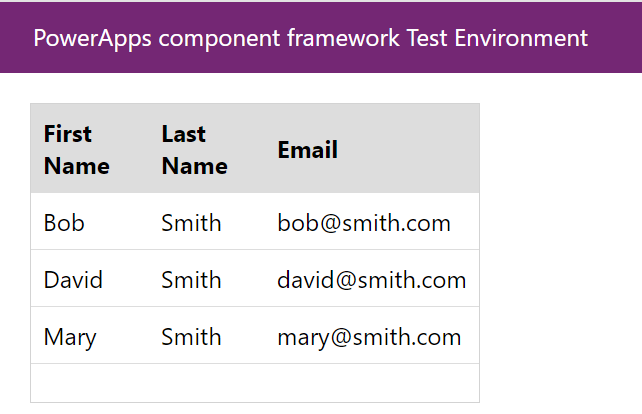
Let’s push this to our org. It looks much better:
Finally, let’s take a look at editing values in a control.
I AM SPENDING MORE TIME THESE DAYS CREATING YOUTUBE VIDEOS TO HELP PEOPLE LEARN THE MICROSOFT POWER PLATFORM.
IF YOU WOULD LIKE TO SEE HOW I BUILD APPS, OR FIND SOMETHING USEFUL READING MY BLOG, I WOULD REALLY APPRECIATE YOU SUBSCRIBING TO MY YOUTUBE CHANNEL.
THANK YOU, AND LET’S KEEP LEARNING TOGETHER.
CARL