Once you have configured Omnichannel in your development org, you will at some point want to migrate that configuration through your environments and up to your production org. In this post, we will look at how to migrate configuration data from one environment to another.
First, let’s take a look at the types of Omnichannel configuration data. Head to the Omnichannel Admin app:

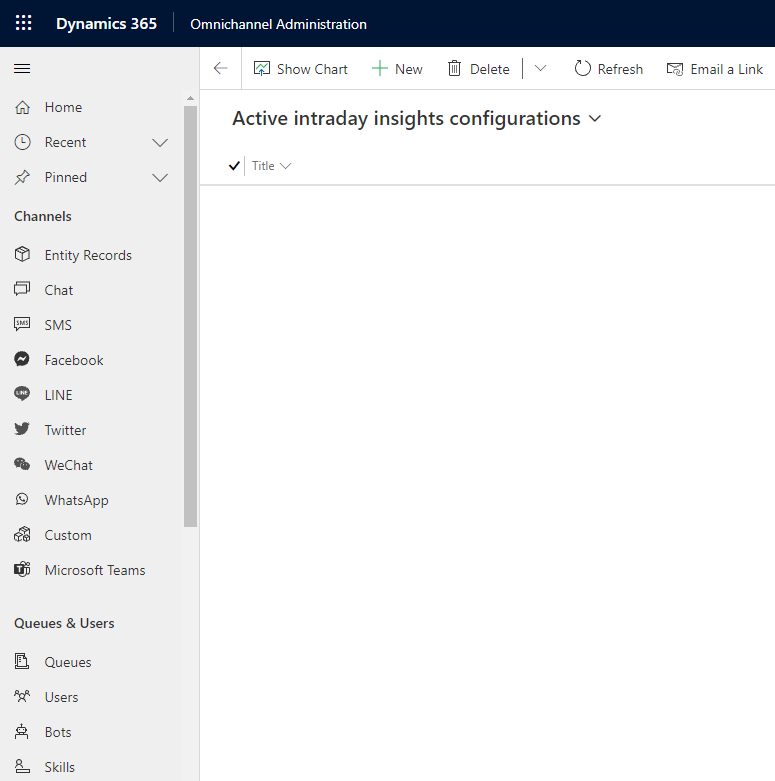
We see there are various entities that go into the configuration of Omnichannel, including channel records such as chat, work streams, sessions, presences, etc:
To move this configuration between orgs, we will use the Configuration Migration Tool.
First, download the tool using the instructions here. If you want generic instructions on how to run the tool, you can see those from an earlier post here.
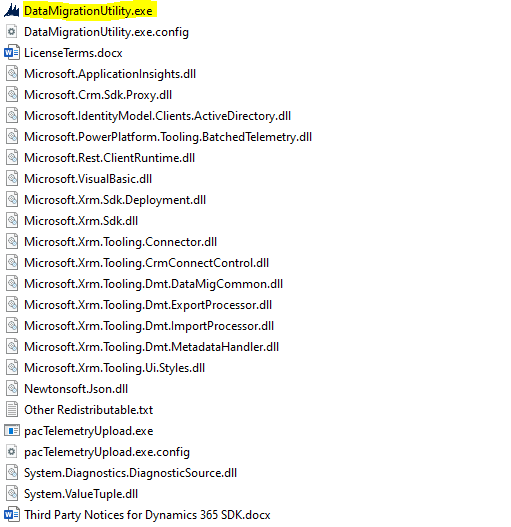
Once downloaded, run the DataMigrationUtility.exe:
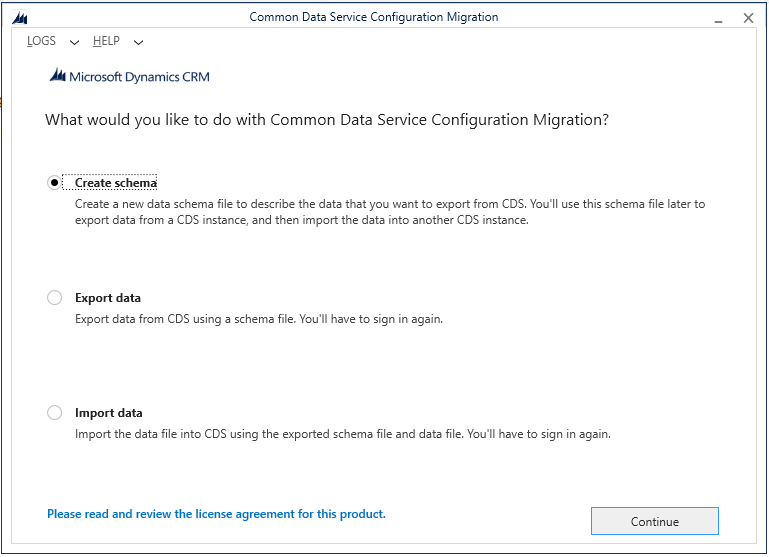
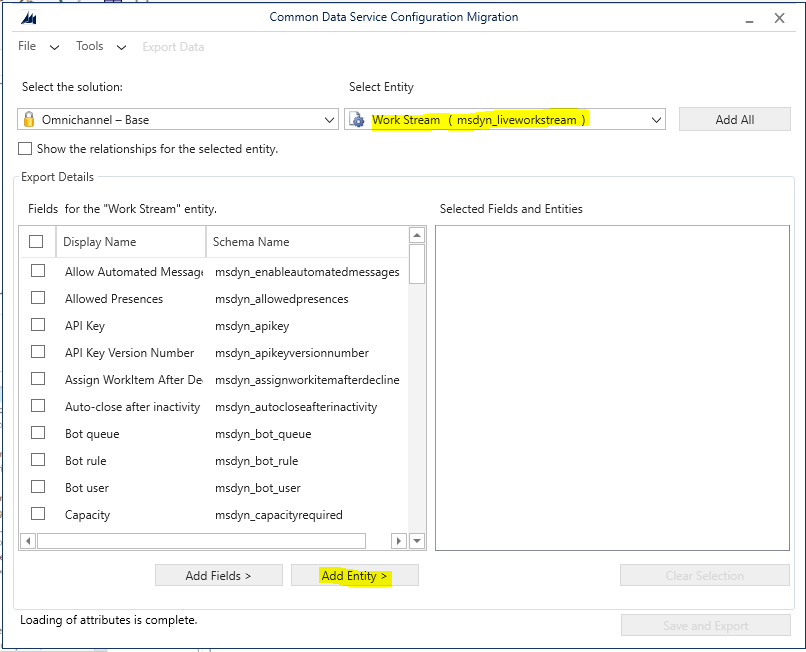
Next, create a schema file. This will list the entities of the records we are moving across. Select Create Schema:
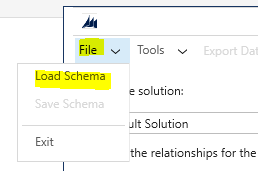
If you have done this before, you can load a previous schema by selecting Load Schema:
In our example, we will move:
- Work Stream (msdyn_liveworkstream)
- Context Variable (msdyn_ocliveworkstreamcontextvariable)
- Queue (queue)
- Quick Reply (msdyn_cannedmessage)
- Presence (msdyn_presence)
- Operating Hour (msdyn_operatinghour)
There may be other sources of configuration that you want to migrate, such as:
- Survey Question (msdyn_surveyquestion)
- Survey Answer Option (msdyn_chatansweroption)
- Context Variable (msdyn_ocliveworkstreamcontextvariable)
- Session Template (msdyn_sessiontemplate)
- Application Tab Template (msdyn_applicationtabtemplate)
- Characteristic (characteristic)
As well as routing rules etc.
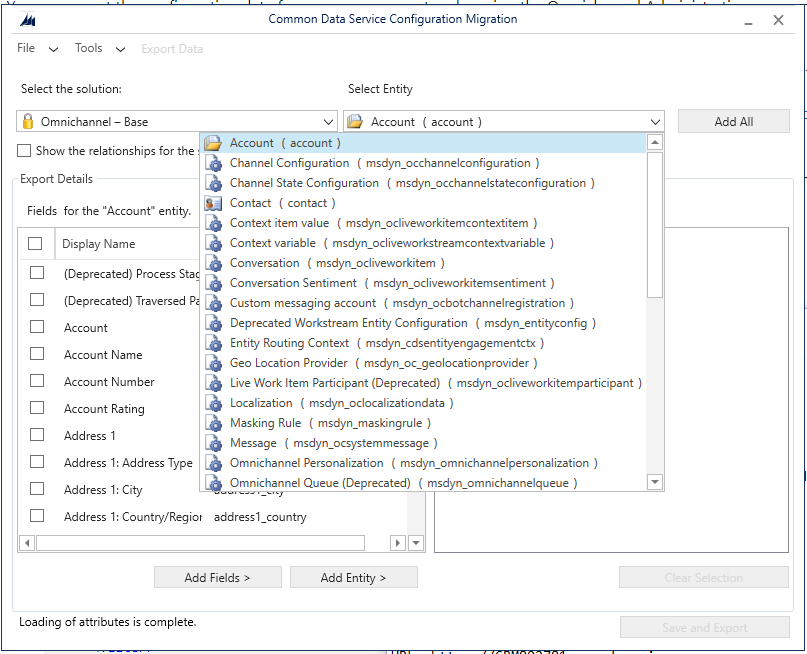
Selecting the Omnichannel – Base solution is a quick way to get to the core entities:
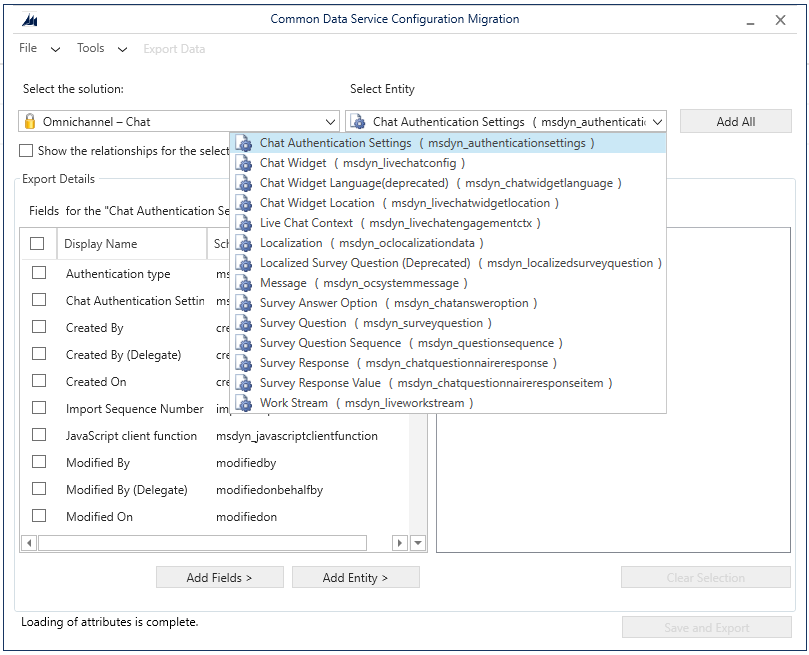
If you are using Chat, you can use the Omnichannel – Chat solution:
Or other channels such as Microsoft Teams, Social Channels etc.
Select each entity to move across and click Add Entity:
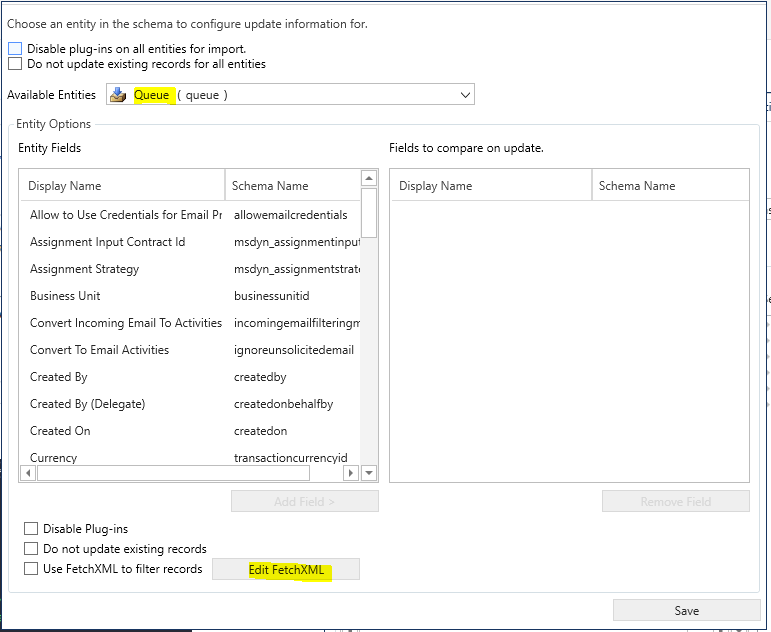
The Configuration Migration Tool uses FetchXML to filter the records being migrated, if you need to bring only certain records. We will filter the queues to bring across as only Omnichannel queues.
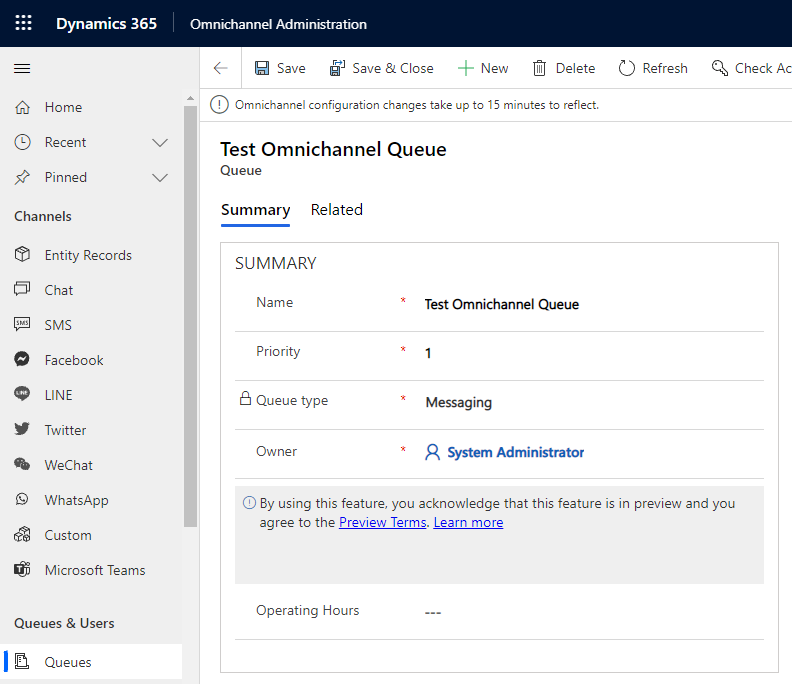
For example, we have a queue called Test Omnichannel Queue, which we created through the Omnichannel Administration app:
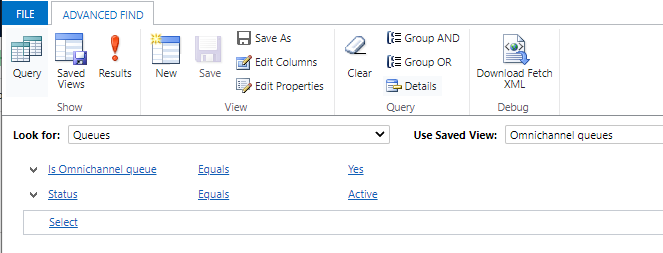
In Advanced Find, we see there is a Omnichannel queues view, which looks like the following:
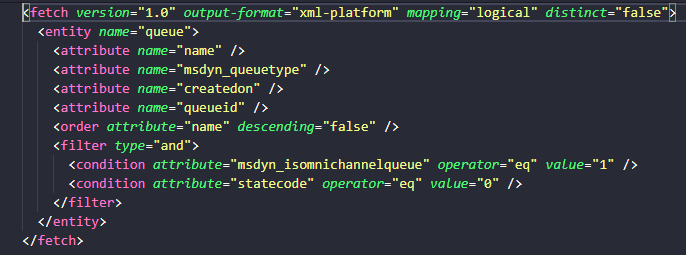
And the FetchXML looks like this:
Let’s add this to the Configuration Migration so we only migrate OC queues. Go to Tools->Configure Import Settings:
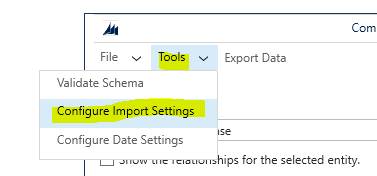
Select Queue and then Edit FetchXML:
Paste in the FetchXML. We do not need the attributes:
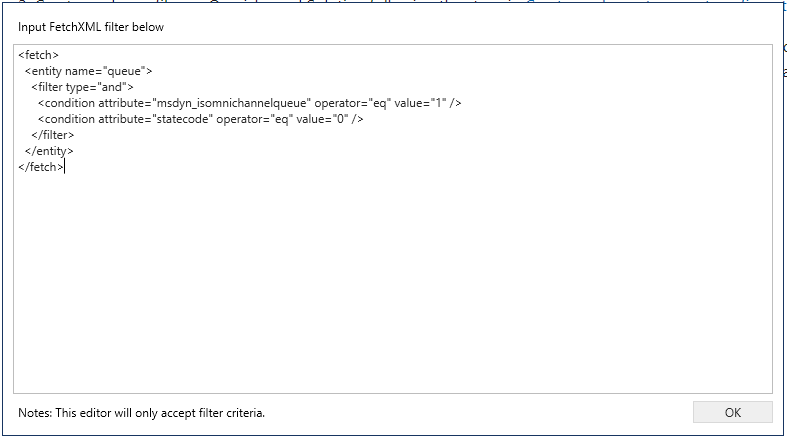
Click OK then Save:

And then Save and Export:

Give the Schema a name and save. You are now prompted to export the data. Click Yes:

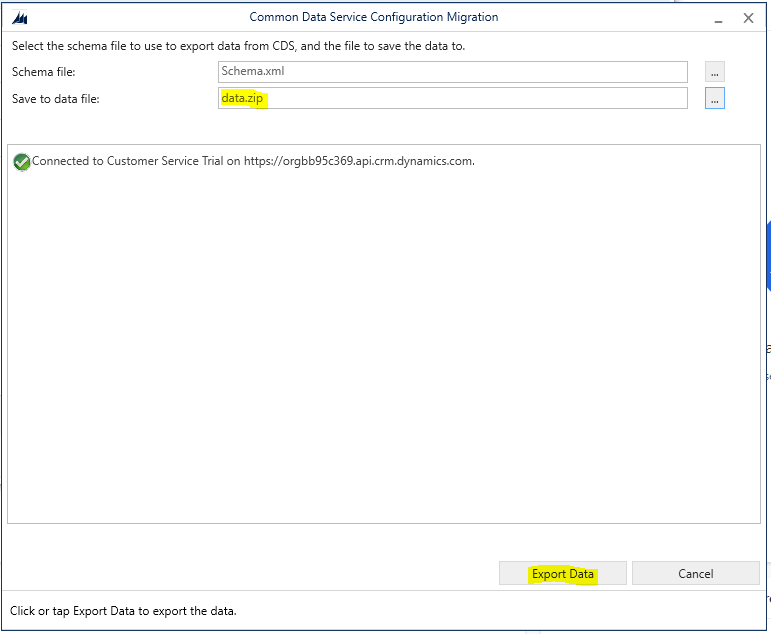
Click the 3 dots to save the data file:

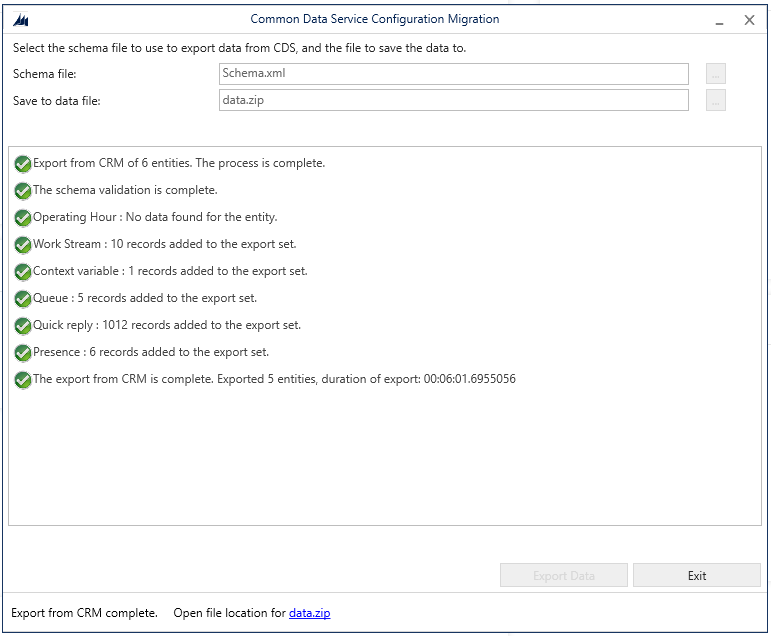
Give the data file a name, e.g. Data.zip, and press Export Data:
Once complete you should see below. Click Exit:
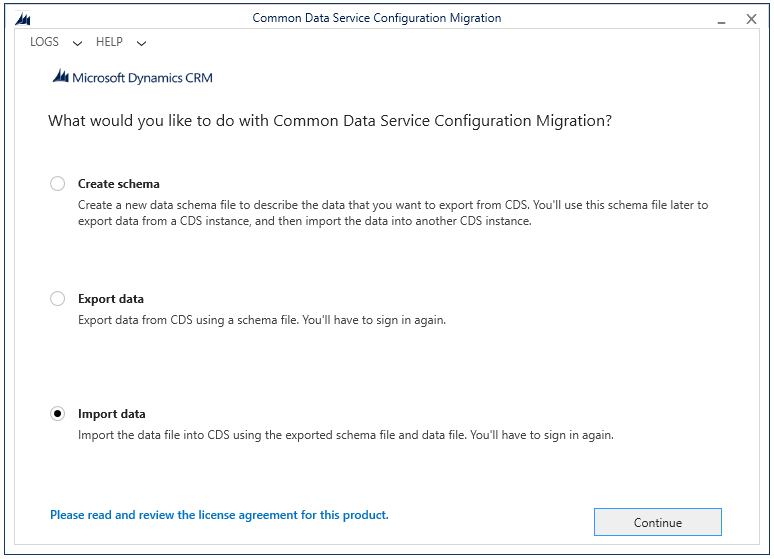
Now click on Import:
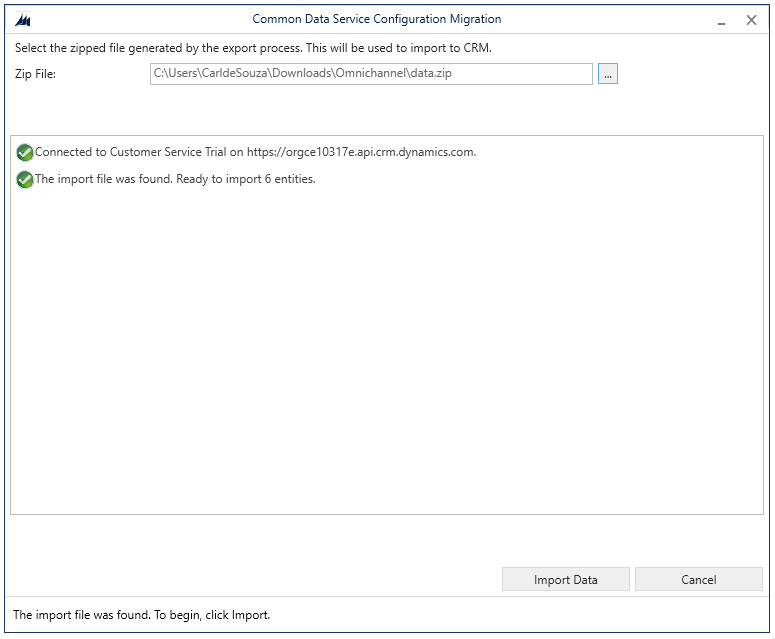
Log into the target org, then select the ZIP file and click Import Data:
Once complete, we see something like below:
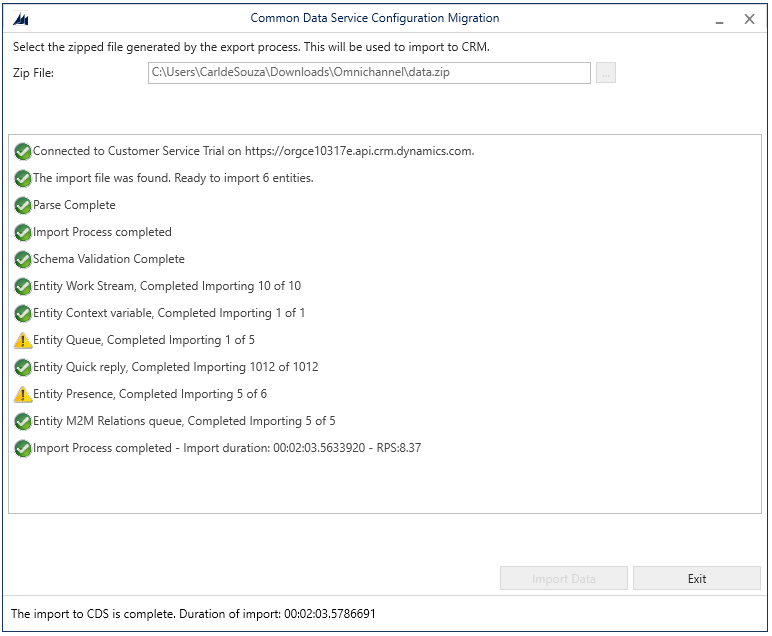
Click Exit.
If we look in our destination environment, we see our new data will exist. Note if you are migrating records that have Azure connections such as Chat Widget (msdyn_livechatconfig) they may not work as expected (i.e. they use the record information for the source organization, not a new configuration for the destination organization).
I AM SPENDING MORE TIME THESE DAYS CREATING YOUTUBE VIDEOS TO HELP PEOPLE LEARN THE MICROSOFT POWER PLATFORM.
IF YOU WOULD LIKE TO SEE HOW I BUILD APPS, OR FIND SOMETHING USEFUL READING MY BLOG, I WOULD REALLY APPRECIATE YOU SUBSCRIBING TO MY YOUTUBE CHANNEL.
THANK YOU, AND LET’S KEEP LEARNING TOGETHER.
CARL